
Nothing can create panic for RV owners like a malfunctioning RV black tank. The black water holding tank system is pretty straightforward. You have a holding tank that captures human waste from the toilet and a valve that opens up the drain, allowing you to empty (dump) your tank. However, what happens when this doesn’t work as it should, and you can’t drain your RV’s black tank?
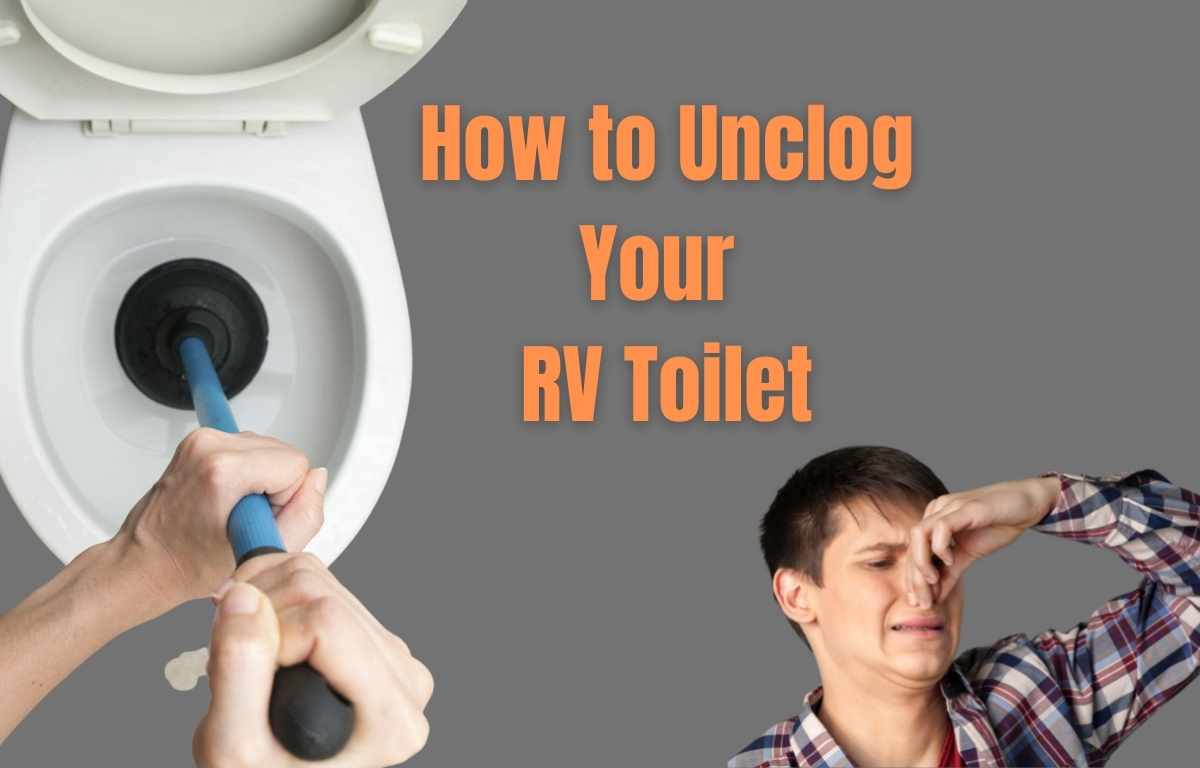
This issue isn’t fun to write about, nor is it entertaining to read. However, you found the right place if you have a problem with a clogged RV toilet or RV black tank clog, and it won’t drain. This advice is relevant regardless if you have a travel trailer, 5th wheel, motorhome, or any other RV with a toilet.
A common issue with a black tank that won’t drain and is causing a backup in your RV toilet system is something RVers describe as “poop mountain,” poop pyramid,” or “pyramid plugs.” It’s not fun to think about, but you should be aware of it using your RV toilet. This phenonium is caused by solids piling up in the black tank rather than mixing with the slurry water to dissolve. The most common cause of this situation is the lack of water. Additionally, this can occur if you use too much toilet paper and not enough liquids. This problem occurs right below your toilet connection or at the valve, preventing the blackwater tank from draining.
Water is critical for your Black Tank.
You create a mini wastewater septic tank when using your RV toilet. By adding chemicals or RV tank enzymes, you allow toilet paper, solid waste, and liquid waste to mix and break down into a liquid slurry, which you can then easily empty when it’s full.
While you need all three of these components for a healthy black tank, you don’t want to forget to add fresh water. You need the added water to disperse the solids so they don’t pile up on the bottom of the tank and create a mountain. When solids interact with the black tank additive and water, they’ll begin to break down. While additives aren’t necessary, they will break down even faster, which is often necessary when camping. The additives will also help with odor. However, the solids won’t break down if you don’t have enough water (or liquid).
When using your blank tank, always start with a few gallons of water in the tank. Then, after you dump, add at least a gallon of water by flushing the toilet and dropping it in the treatment capsule or powder. If you don’t have enough water in the tank, there is no way for the solids to break down. Also, don’t add too much water, or you’ll lose the capacity in your tank and need to dump more frequently. This is why keeping your black tank open when connected to the RV sewer system at the campground is not recommended. In this case, an ounce of prevention is worth a pound of cure.
Toilet Paper Selection
If you’ve done any research on toilet paper for your RV, you’ve likely seen many different opinions. Should you use RV-friendly toilet paper? What brands work best? Should you even put toilet paper in your tank? Well, feel free to take my opinion as just that, an opinion, but the toilet paper debate is really irrelevant. I have used my RV full-time for two years, never used RV toilet paper, and never had a problem with a clog. The critical thing is to use a good tank treatment and enough water to allow the enzymes to break down the paper and solids.
A bit about black tank treatments
There are dozens of options for tank treatment, but most will advertise odor control and different fragrances. So again, I suggest choosing function over flavor. I have tried dozens of brands, but the Happy Camper brand is my absolute favorite. This powder dissolves the solids super-fast and provides excellent odor control.
If the odor becomes an issue on hot summer days, I keep a bottle of fragrant fabric softener and put a little in the tank. However, I rarely have to do this with Happy Camper. Happy Camper also works excellent for the grey water tank, which I use periodically to keep it nice and clean. This additional step is beneficial for keeping your tank sensors functional.
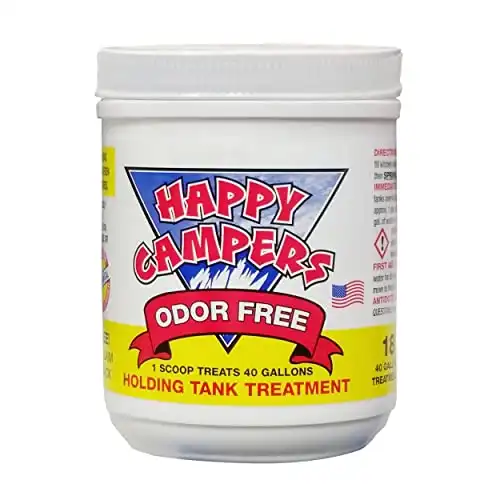
This wastewater treatment is what I use regularly. It simply works better than anything else I've found on the market.
How to fix a clogged toilet?
Sure, prevention is the best way to never worry about a clogged black water tank, but what do you do if your RV toilet clogs? Luckily, This is a common problem, and solving it isn’t too difficult. Below are a few proven home remedies you can try, and one is bound to work.
Can You Use Drain Cleaner Like Draino?
In short, you should not use a liquid drain cleaner like Draino to dislodge a black tank clog. The drain cleaner works on clogs in sinks and small-diameter pipes but not RV tanks. The harsh chemicals in the cleaner can damage your RV plumbing system and lead to more problems beyond the clog.
Water, tank treatment, and time
This method is probably the least effective, but if you have time to let your black tank sit, this is one of the easiest ways to tackle a “not too bad clog.” First thing, select a powerful black tank treatment that advertises fast breakdown of solids. I like to use two (an extra) scoops of Happy Camper. Then, fill your black tank with water to cover the solids and add the extra treatment medium. This technique usually works best in warmer temperatures. You can even let it sit for a week or two between camping trips. Eventually, the solids will break down. Rather than using harsh chemicals, natural treatment products works best. All RV stores will carry chemical cleaners for this purpose. My favorite is Happy Camper, which I use regularly and never have a clog.
This technique is not necessarily my recommended approach because it’s not an instant solution. Also, if the clog is bad and you can’t get water into your tank, it may not work. However, it will eventually work if you do this and wait long enough. The worse the clog, the longer it will take.
Boiling Water and Liquid Soap Method
Another cheap technique is to clear out a clogged black tank using hot water. Some people suggest using boiling water, but I suggest letting it cool a bit so you don’t cause any damage to the rubber seals or plastic in your black tank. Boil water on the stove, and once it’s ready, turn it off and let it cool a bit. Pour at least a gallon of the hot water into the tank and let it sit for an hour or two, then try to drain your tank. If the water is boiling, open the toilet valve and pour water directly into the tank instead of the toilet bowl to prevent damage to the rubber seal.
You can add a little Dawn dish soap (or similar) to the tank. The soapy water will help to break down some of the solids and release the waste buildup. You can repeat this process if it doesn’t work the first time. This works because solids will break down faster in warm water. The boiling water will help the remaining water and solids in the tank heat up and begin to dislodge the solids.
Ice and drive method
Another method suggested by fellow RVers is the ice cube method. The theory behind this technique is that the ice cubes act as an agitator when you drive around. The tank liquids and ice will slosh around, hopefully dislodging the solids pile, causing your clog. It’s best to try to fit in two full bags of ice if you try this. Also, add it before you drive so it doesn’t melt and become ineffective. The next time you dump, it should flow free,
The downside to this method is that you must do it at the end of your camping trip. Otherwise, you’ll need to pack up your RV during your stay. Also, once you dislodge the clog, you may want to wait a couple of days for the solids to dissolve before you dump it. This solution is best to try at the end of a campground stay or when traveling between sites. This solution is not helpful if you’re in the middle of a camping trip and need to dump your tank.
The Broom Stick Method
This technique is probably my least favorite method since it can be messy, and you may never want to use the broom again. You don’t need a broomstick, but you want something rigid that won’t break. With the toilet valve open, stick a long rigid pole down into the tank and push things around. Once you think you have dislodged the clog, the next step is to check to see if it’s draining. It’s helpful to have someone outside by the drain valves and communicate with you once the waste starts flowing.
This technique will only work if you have a straight opening into your RV toilet holding tank. If the clog is within reach of the stick, you should be able to break it up and solve your problem. This won’t be effective if you suspect the clog is by the drain valve. Your best bet would be to try one of the other methods. Also, don’t forget the rubber gloves!
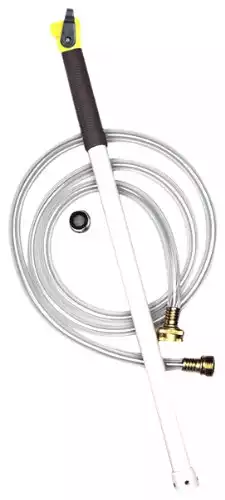
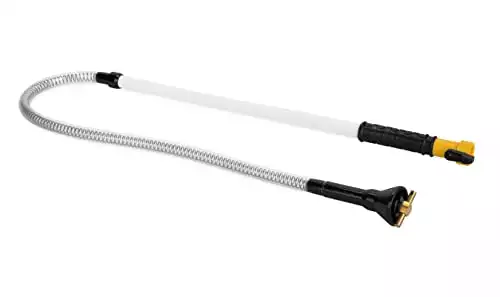
RV Toilet Wand
This technique requires an extra tool but will work almost every time. If you don’t currently have a black tank spray wand, it’s a good idea to pick one up so you have it for future clogs. A wand is a simple black tank cleaner tool consisting of a pipe or hose with a nozzle at the end that provides a power-blasting spray to break up whatever’s causing the clog. It’s similar to the same drain snakes (or toilet snake) they sell for homes but optimized for the RV toilet. RV toilet wands are often a lifesaver for a stubborn clog as the pressurized water quickly dislodges it.
Two types are available: 1) A straight, rigid pipe and 2) a flexible hose. If your toilet has a straight opening into the black tank, that rigid one is for you. However, if your toilet has an angled pipe into the black tank, you’ll need to flexible hose model.
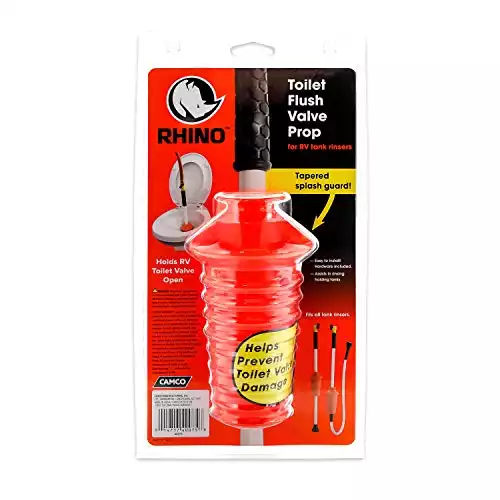
A wand is an inexpensive piece of equipment for your RV toolbox. A few manufacturers make a wand, but my favorite is the Camco brand. Camco offers both a rigid and flexible model. They also sell an accessory, the flush valve pro, which holds your toilet valve open and prevents spray water from coming back up the toilet.
|
Straight Connection
|
Curved Connection
|
Must Have
|
|
|
$43.20
|
$13.44
|
Black Tank Flush
If your RV has a built-in black tank flush, try this. It will work similarly to the wand using high water pressure to blast away stubborn clogs with a built-in spray nozzle, but you don’t need separate equipment. The flush is often used for cleaning the tank, but if wastewater can drain from your black water valve, you can connect a garden hose to the flush port on the RV and let it run for a while.
I highly suggest you invest in a separate hose and not use your fresh water hose for this purpose. This step is best done when connected to a sewer or RV dump station. You can use a lot of water, so a portable waste tank is time-consuming. If it doesn’t dislodge the clog, you may want to try the wand.
Gray water backflush
This easy technique may be the solution if you’re at the campsite and have a clogging problem. This technique works best for clogs at the flush valve of your black tank. I’ll do my best to describe it, but it will make sense when you watch the following video example. The good news is that you don’t need additional equipment, just the sewer hose connected to your RV black water tank.
This technique uses water from your gray tank to backflow into the black tank and removes the clog. It’s best to attempt this technique with two people. The first step is to close the black tank gate valve when you notice that your black tank isn’t draining. Next, you will want to open the greywater dump valve and fill the sewer hose with water from your grey tank. Next, as soon as the hose is full and before it drains into the sewer line connection, lift the hose above the height of the gray water tank. Next, close the grey tank valves. Then, open the black tank valve with the hose still in the air. This step will allow the water in the hose to flow up the outlet of the black tank, hopefully dislodging the clog. Once the water backflows into the black tank, quickly drop the hose to the ground. The force should be enough to suck the clog right out of the tank. If it doesn’t work the first time, you can repeat it until it does.
Conclusion
While a clog in your RV black tank or toilet is annoying, it doesn’t need to put a damper on your camping trip. The main reason for this problem is typically not using enough water in your tank or failing to add a chemical treatment regularly. The suggestions listed in this article should be enough to fix almost any RV black tank clog. Depending on the type of clog, you may need to try several different methods. However, if all else fails and you have a severely compacted tank, you can always call a septic system cleaning company as a last resort. They’ll come out with a power or manual auger and get it clean. With regular maintenance and preventive measures, you can prevent most clogging scenarios in the first place. Hopefully, with the tips provided above, you can handle it on your own.