One of the more challenging parts of RV living is dealing with humidity, both in the summer and winter. An area that’s easy to forget about, which is notorious for moisture and mold, is under the RV mattress. Keeping you’re the underside of your RV mattress dry is critical for preventing mold.
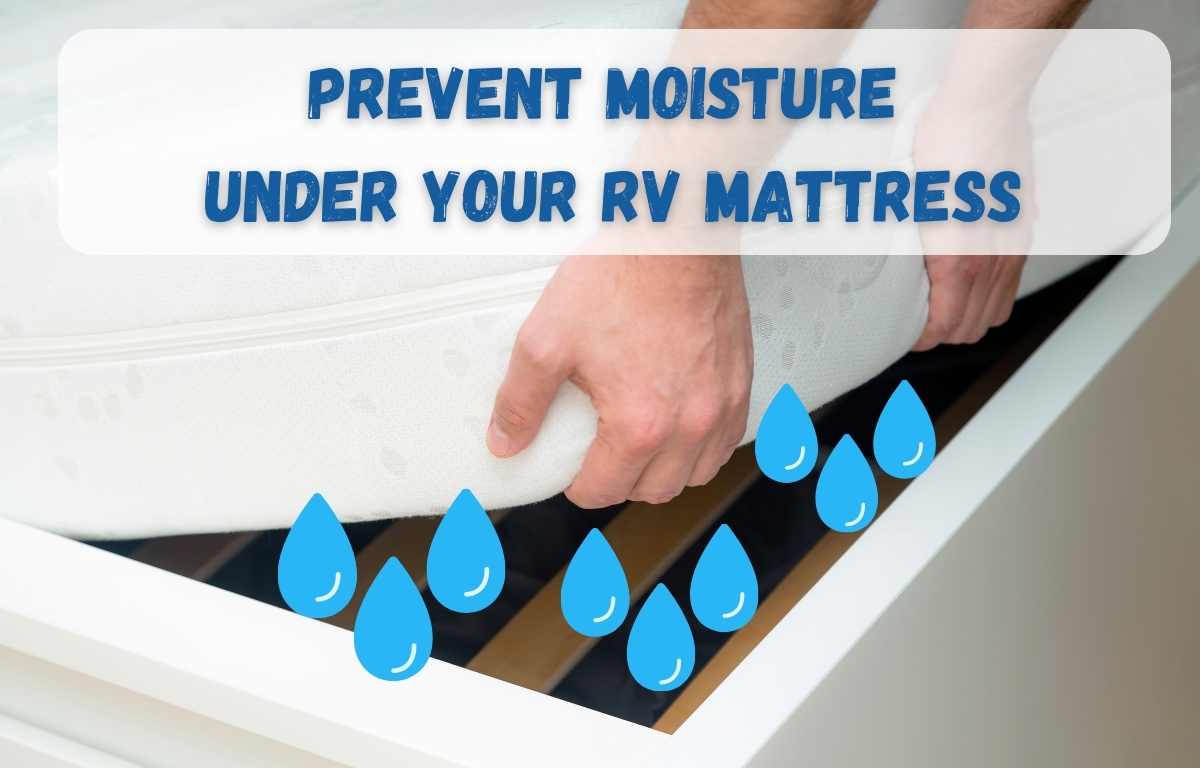
RV mattresses tend to be a hot spot for moisture. This issue is primarily due to the lack of airflow under the mattress. Since RV mattresses don’t typically have box springs, their heaviness can allow moisture to build up and trap it, causing wet mattress bottoms and mold growth.
Luckily, this problem can be easily remedied. To do so, you will need to focus on two key steps: 1) reduce humidity in your RV and 2) increase airflow under the mattress.
Reducing RV Humidity:
Humidity in RVs is a common problem. Whether you’re trying to keep your RV cool or warm, most owners will try to seal it up. Also, if RVs are your periodically, they don’t have constant climate control. So the easiest and foolproof way to reduce humidity is to use a dehumidifier.
There are many different options available at different sizes and price points. A larger dehumidifier is more costly and takes up more space, but it will do a much better job removing humidity from the air. However, smaller and more economical models are available and will work well. You may need to run a small unit longer and empty it more frequently.
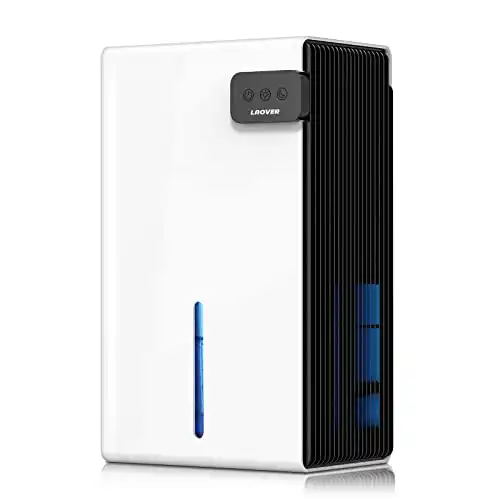
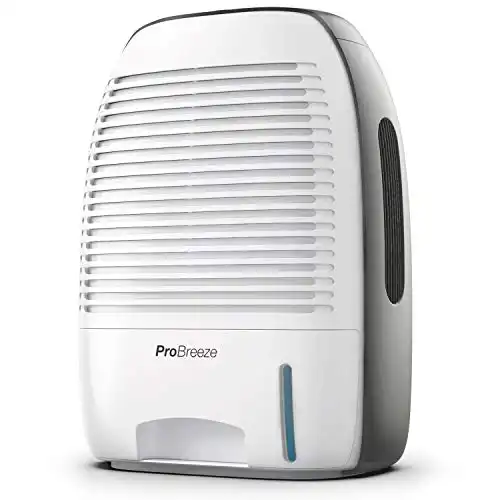
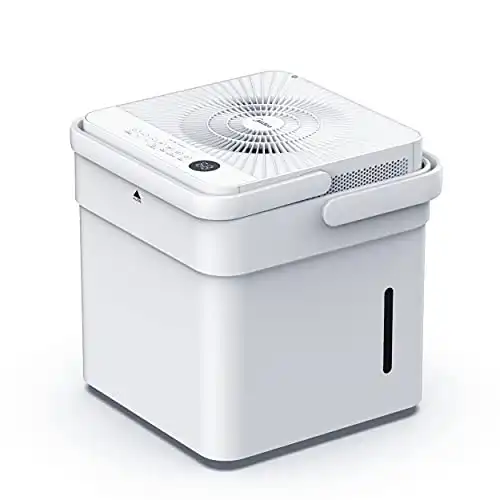
Below are some great options for both small and larger dehumidifiers:
| Product Image | Product Name | Price / Primary Button |
|---|---|---|
|
2500 Sq. Ft.
|
|
|
|
1500 Sq. Ft.
|
|
|
|
550 Sq. Ft.
|
|
|
|
720 Sq. Ft.
|
|
|
|
680 Sq. Ft.
|
|
|
|
250 Sq. Ft.
|
|
|
|
1500 Sq. Ft.
|
|


Increasing airflow under the RV Mattress
Humidity under the bed can be challenging to handle, but you can easily accomplish it with a few simple steps.
First, allow your mattress to breathe. One way to accomplish this is the flip your mattress periodically, which will allow the bottom to air out and expel moisture. During the most humid times, it’s helpful to flip your mattress weekly.
The other technique to reduce moisture under your mattress is to install an anti moisture mattress underlay. Several products are available to do this, or you can take the DIY route and save some money. Below are some excellent options:

If you want a simple solution that doesn’t require additional work on your end, you can purchase an underlayment for your mattress that will provide for air to follow under it. The Den-Flo Mattress Underlay comes pre-sized for all different mattress sizes.
The pad is made from spun polyethylene that provides a woven layer of fibers, allowing airflow to make its way under the mattress. It comes in both king, queen, and twin sizes. If you have a full-sized RV mattress, you will need to order a queen and cut it to size, which you can easily do with a pair of scissors.

12 Pack Modular Interlocking Cushion
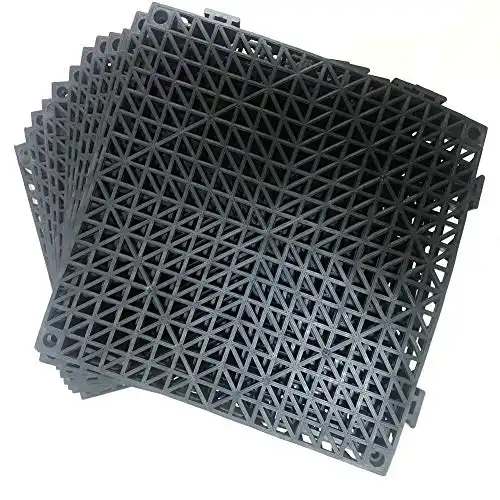
Another less expensive option is to use modular interlocking cushions. These cushions come in a pack of 11.5″ x 11.5″ squares. If you’ve ever been to a pool or wet area that has rubber mats (the ones that hurt your feet), these are the same thing. They’re made out of flexible rubber and connect with interlocking edges. While you wouldn’t want to sleep directly on these, they won’t be noticeable under your RV mattress.
Many RVers use these tiles by placing them under the mattress. The open spaces inside them allow for airflow and do an excellent job of keeping your mattress dry. For most RV mattresses, you’ll likely need two packs to cover the entire mattress underside. However, they’re relatively inexpensive, making for an affordable solution to RV mattress moisture.

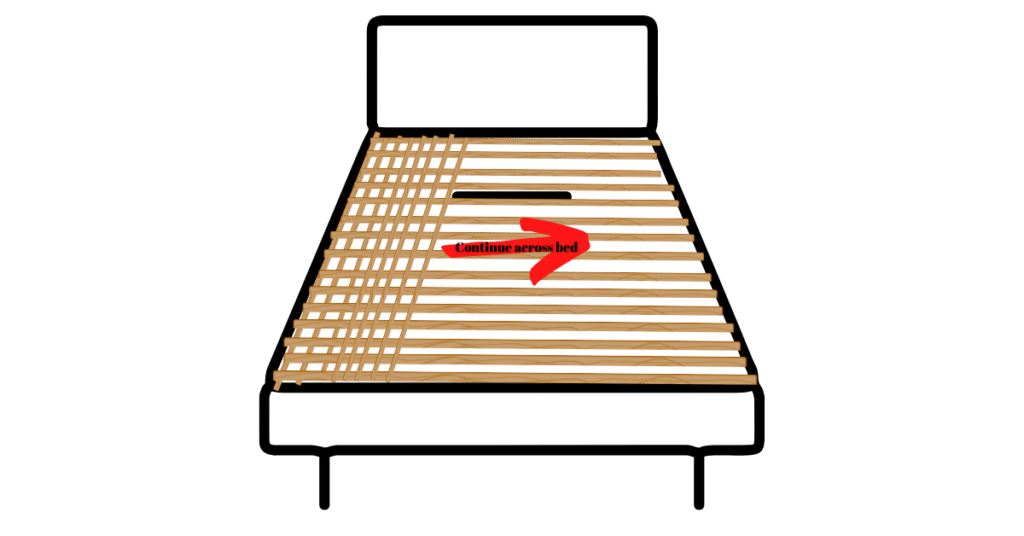
Build a wooden platform
This technique is probably the least expensive (unless lumber prices skyrocket again). However, it may not be the most comfortable unless you also have a nice mattress pad. To do this, use some 1×2 (furring strips) pieces of lumber cut to the length and width of the mattress. Start by laying out the length-sized pieces about 4 inches apart across the entire width of the bed frame. Then, if you want, you can secure these to the wooden platform that the mattress sits on with small nails. Doing so will save you time rearranging them when you flip your mattress.
Next, repeat the process with the same size boards running width-wise across the length of the bed. You are essentially making a grid pattern under your mattress. You can increase the space between boards if you want, but the more significant the distance, the more mattress sag you’ll get, making the mattress less comfortable. For a standard queen-sized mattress, with strips spaced four inches apart, you’ll roughly need 28 1x2x8 boats, costing around $50.