
In this article, I’ll walk you through every aspect of the RV water heater. While water heaters are not very complicated appliances, when they don’t work as anticipated, it’s not always easy to figure out what’s going wrong. This article is a bit long, so I highly suggest clicking on the table of contents below for easy access to the topic you are interested in learning more about. Also, Here below are some quick tips for some of the most common RV water heater problems.
Common Water Heater Problems and Solutions:
- Hot Water Tank Not Filling: Check for closed valves or kinks in the water lines and ensure your water system isn’t in bypass or winterized mode.
- Lack of Hot Water: Ensure the heating element or gas burner is functioning properly.
- Heater Malfunctions with Electricity or Propane: Check power sources and connections and ensure fuel supply for propane heaters.
- Water Leakage from Heater Access Panel: Inspect for loose fittings or damaged tank.
- Indicator Light on Water Heater Switch: This usually indicates that the water heater failed to light. Check your propane or igniter.
- Strange Noises from Water Heater: Often caused by sediment build-up; try flushing the tank.
- Water Smelling Like Rotten Eggs: This is typically due to bacterial growth; sanitize the water system.
- Uneven Water Temperature in Tankless Heaters: Clean and maintain the water heater, ensuring proper gas pressure and flow rate.
- Tankless Heater Failing to Light: Check for issues with the gas supply, igniter, or flame sensor.
More details on all of these issues are covered in detail below.
The RV Water Heater
RV water heaters are generally reliable and can usually be repaired instead of replaced. There are two main styles of water heaters found in RVs. First, most RVs will come with a tank system, typically providing 6 gallons of hot water storage. However, some have an increased capacity, usually in larger RVs. The other style is a tankless water heater, which doesn’t store hot water but supplies it on demand. While these are less common, they’re becoming more standard in newer RVs. Additionally, many RVers choose to upgrade their water heater to a tankless system.
Water heaters use propane, electricity, or both to heat the water. We’ll cover common issues with water heaters and ways to repair them. But before we get into that, let’s look at how an RV water heater works. A little basic knowledge will help you troubleshoot your problems, allowing you to make many repairs yourself.
Hot water in an RV makes camping much more comfortable and convenient. The system used to produce hot water is not too different from what you have in your home; it’s just a little smaller. Your plumbing system has two separate water lines, or pipes, running through the RV, one for cold water and one for hot water. The way that the lines run will differ from RV to RV depending on the layout, but typically, your freshwater supply will have one line that runs from the inlet (city water or water tank) to the water heater. At the water heater, there will be T-valve, which will split the water delivery into hot and cold supplies. The hot water line will pass through the water heater inlet, and the cold-water supply will go to your faucets. If you have a new RV, there’s a good chance that it uses PEX pipe, which will likely have two colors: blue for cold and red for hot.
The water that goes into the water heater will then be heated and delivered to your faucets by a separate hot water supply line. If you have a standard tank system, the water will fill the tank and be heated by propane, electricity, or both. The tank is well insulated and will use the heating systems to maintain the water temperature. A tankless system will simply stay on standby until you request hot water by turning on the faucet. Once you do, the water will be heated instantly by the system.
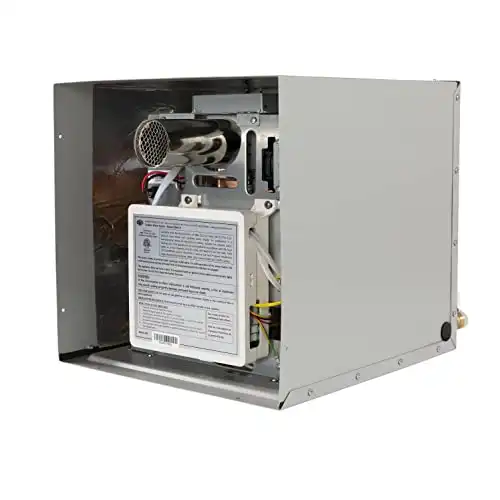
Tank Water Heaters
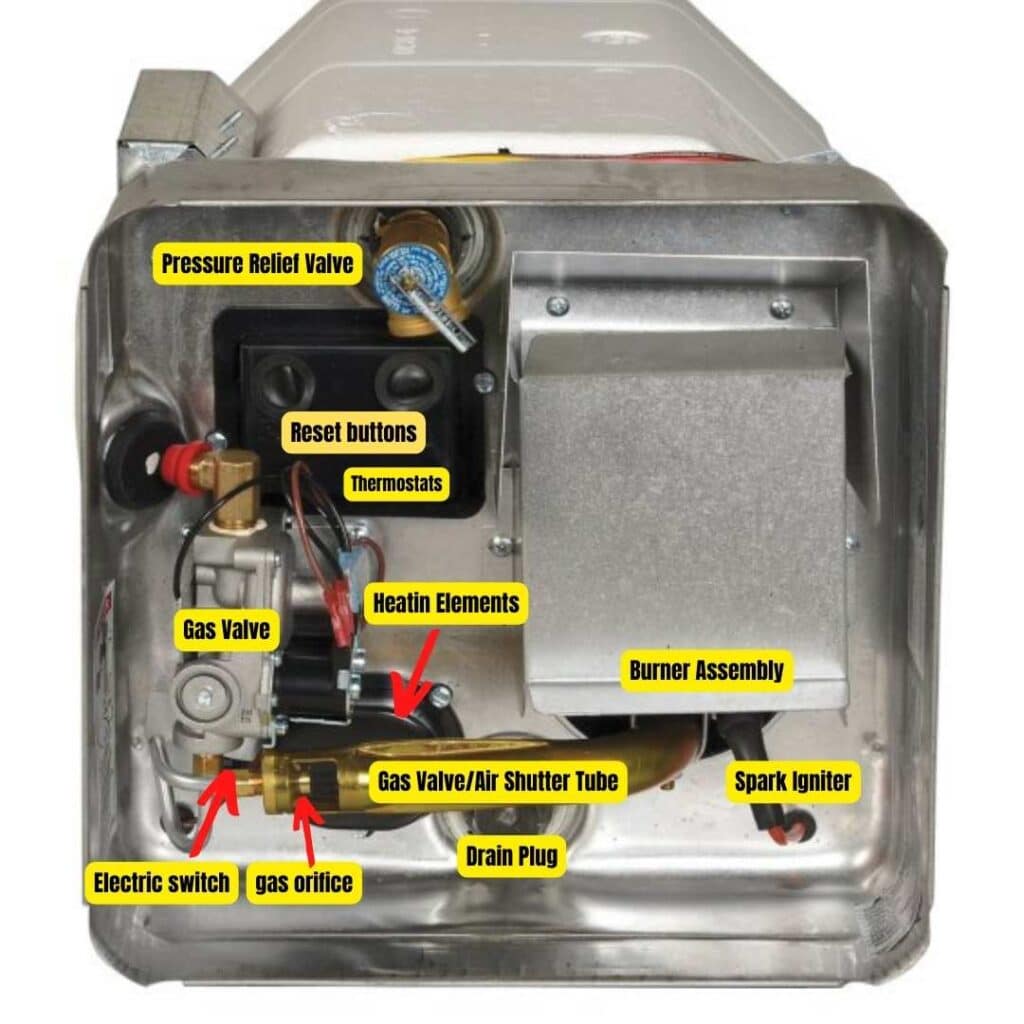
A tank water heater has been the staple of RV water heaters for as long as RVs had water heaters. They’re still used today, without many changes, which is a testament to their durability and design. There are a few leading manufacturers of RV water heaters: Atwood, Suburban, and Dometic. These companies produce similar water heaters and offer propane or dual propane/electric models. You may see the water heater describes as one of the following types:
- Manual Gas Valve: utilizes a standing pilot light lit outside the RV.
- DSI (Direct Spark Ignition): Uses a switch inside the RV to light the propane burner on the gas water heater.
- Electric: Some RV water heaters also have a submerged electric element that heats the water within the tank. These are sometimes referred to as electric combination water heaters.
The standard size found in most average-sized RVs is 6 gallons. However, some RVs may have larger capacities, with 10 gallons being the next most popular size. The major difference between sizes is the capacity of hot water they will hold. Larger water heaters will take longer to heat but provide more hot water when needed. In most instances, you won’t be able to choose the system size for your RV. Also, if you replace your heater with another tank system, you will likely have to use the same size tank since most units are installed in a tight space.
While some standard tank water heater models offer electric heating, all will utilize propane. An electric water heater is a great choice if you’re camping at full hookup sites with access to AC power. A dual heating system is nice as it allows you to take advantage of shore power at the campground and use electricity to heat your water, but it provides you with an alternative to use propane when boondocking or off the grid. Another common feature of some models is an electric igniter, which prevents you from lighting a pilot light on the water heater. Most new RVs will have an electric igniter. Tank RV water heaters are generally efficient. They will keep water hot for longer and kick on only when needed to maintain the temperature. They will hold the hot water for hours on end in moderate temperatures.
Common Questions about your RV Water Heater
Should I use electricity or propane or both?
This question is a common one that many new RV owners ask. The simple answer is that there is no right answer, and both options will work fine. However, many RVers will use both at the same time. Propane will heat the water faster than electricity, but electricity will maintain the heat more evenly. I recommend using both options when connected to shore power to provide you with the best of both worlds.
How long will the hot water last?
The size of your tank determines this answer. The most demanding uses of hot water are when taking a hot shower or doing dishes. A typical RV showerhead will use between 1.5-3 gallons of water per minute. When showing and using mixed hot and cold water, you can expect a 6-gallon water heater to provide enough hot water for a 5–6-minute shower. However, this largely depends on the water temperature you use when showering. Showering in an RV is a skill you need to acquire, especially if you are used to taking what my dad called a “Hollywood shower” (15 minutes or longer). Many RV showerheads will have a shutoff valve on the handle, allowing you to wet yourself down, turn it off when lathering up, and easily turn it back on to rinse. Once you get acquainted with the hot water supply, it won’t seem like a big limitation, and you can avoid cold showers. However, some campers want instant hot water, which drives the move towards tankless systems, which provide an endless supply of hot water. However, if your tank size limits you, try to shower with warm water rather than hot water to conserve your supply in the hot water tank.
How long does the RV water tank take to heat up before you can use it?
Again, this answer will depend on your tank size. In a typical 6-gallon unit, you can expect anywhere from 15-30 minutes, depending on the temperature of your cold-water supply. If you want the fastest heating time, you’ll want to use propane to heat the water.
Tank RV water heater regular maintenance
To keep your tank RV water heater in good working order and limit future RV water heater problems, you will want to maintain it annually and inspect it throughout the year. Some of the common reasons your water heater isn’t working correctly may be due to a lack of maintenance. Most maintenance work simply involves flushing the system and replacing the anode rod if your unit has one. You should also give the water heater exterior a quick visual inspection. Let’s take a look at each of these steps.
Flushing your RV water heater
You should plan to drain and flush your water heater at the end of each season. Over months of use, your water heater may develop a buildup of magnesium and calcium deposits, white solids that attach to the inside you’re your tank. While these deposits are harmless, if not flushed out, they can impede the functioning of your water heater. However, cleaning them out is pretty easy.
When flushing your RV water heater, you first need to turn off the gas and electricity to the switch. You should have switches inside the RV on or near the control panel. Let the water cool for a few hours before proceeding with the maintenance. Then, run the hot water until it cools down if you don’t have time.
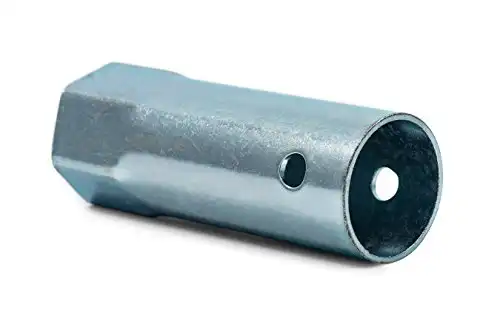
Next, it’s time to drain the RV water heater tank. Start by turning off the water at the city water connection or turn off the pump if you’re using your freshwater tank. It will continue to fill when you open the water heater if you don’t. There should be a larger plug with a bolt head on its end on the tank’s exterior. This plug/bolt also doubles as the anode rod in many models. You will need a deep socket, a large ratchet, or a breaker bar to free the plug. This can be difficult to remove if it’s your first time removing it or if it has been in the tank for a while. Start by breaking loose the bolt but do not remove it yet. Unscrew it to the point where you can turn it with your fingers. Water will likely start to seep out.
Next, you will open up the pressure release valve on top of the water heater’s exterior. This valve flips up to a horizontal position. It should lock in position when all the way open. The following step can get a little messy, so be sure to step out of the way of the drain valve. Slowly continue to unscrew the drain plug and remove it. The water will rush out now that the pressure release valve is open. The pressure relief valve lets air into the tank, which increases the water flow out of the drain plug opening. You may notice white deposits coming out with the water as it drains. Heavy deposits can create low-pressure problems with your hot water flow to the faucets.
Continue to let it drain. You can even use a screwdriver or another thin tool to help release some of the deposits if they get jammed in the opening. Continue letting it drain until empty. If there was a lot of material buildup, you might notice it didn’t all come out. In this instance, give it another flush by reinserting the plug (finger tight), turning on the water, and allowing it to refill. Then repeat the process.
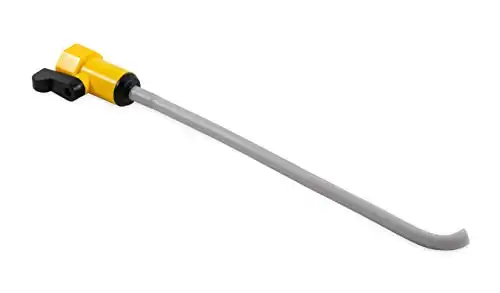
You can also purchase an attachment for your hose with a small nozzle to insert into the tank plug to flush out many solids. They are very effective and a nice tool to have on hand for tasks like this. Camco makes a cleaning wand, and it’s relatively inexpensive.
Descaling your RV water heater tank
Once you get as much calcium and magnesium buildup out of the tank as you can by flushing, you can do a descaling cleaning if you wish. This step involves giving the inside of the tank a vinegar soak, where the acidic vinegar will break down whatever buildup is remaining in the tank. To do this, you’ll want to add a 50/50 mixture of vinegar and water to the RV water heater tank. There are a few ways to get the mixture inside the tank. The easiest is to remove the pressure release valve and pour it in with a funnel. Another way is to utilize your winterizing setup to add the vinegar mixture to the system like you would antifreeze. However, in this instance, you’ll want to leave the bypass valve at the water heater open so the mixture fills the water heater. The benefit of this process is that it also sanitizes your water lines if you choose to run the mixture to your faucets.
Once the mixture is in the RV water heater tank, you will want to let it sit for a few hours. If you can, I recommend letting it sit overnight. Then, when you’re ready to drain it, open up the plug and pressure release valve and proceed as you did in step one. Giving your entire water system a second clean water flush would be best to remove the vinegar taste and smell from your water lines and faucets.
Anode rod replacement
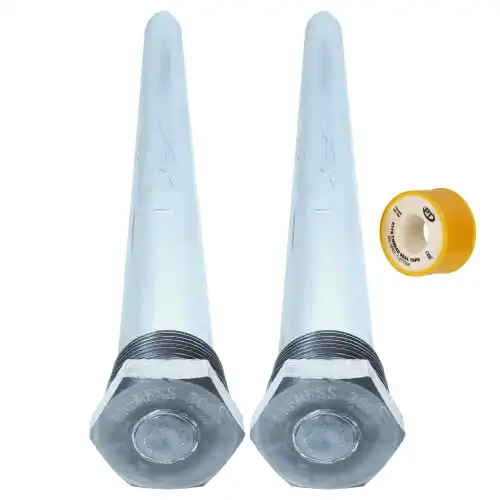
Now that you have a clean tank, it’s time to replace the water heater anode rod if needed. The anode rod is a sacrificial piece of metal that allows corrosion to attack the rod instead of the still body of the tank. You may not have an anode rod if you have an Atwood water heater since the tank is made from Aluminum and is not needed. However, suburban RV water heaters will have an anode rod.

If your RV water heater does use an anode rod, it’s very easy to replace. It’s affixed to the new drain plug, replacing the one you removed. Use plumber’s tape to provide a better seal and aid in future removal. Wrap the threads of the anode rod/plug with the plumber’s tape and reinstall it. When tightening the plug, snug it up, but don’t apply too much force as it can damage the threads or be difficult to remove next time.
Visual Inspection
You’re done with the hard stuff if you’ve completed the previous steps. Before you call it a day, give your water heater a good visual inspection. First, check the burner assembly and make sure that there isn’t any black residue forming, indicating incomplete combustion. If you have a dirty burner or burner nozzle, you will need to adjust the flame by adjusting the air opening.

Check for debris, leaves, spider webs, dead bugs, etc., inside the access panel door and vent. Clean it out and give the entire unit a quick wipe-down with a damp towel. Next, inspect the caulking around the water heater frame. Make sure that it’s not cracking or peeling. If it is, you’ll want to repair it. Also, make sure that the exhaust area is free of obstructions.
Common Problems with Your Tanks Water Heater
The RV Water tank isn’t filling.
An RV water tank that doesn’t fill is a problem that many RVers experience at the start of the season. When winterizing your RV, you must put the water heater into bypass mode. When you bypass the water heater, you close the valve, preventing water from filling the tank. When you open up your RV in the spring, you’ll need to reopen this valve. This step is easy to forget when you first use your RV for the camping season. You can usually find the valve near the water heater, but in newer RVs, there may be a water control panel with the control valves in one place. Open the bypass valve, and you should be all set. Look in your owner’s manual under the winterizing section if you can’t find the valve.
You’re not getting hot water.
If you’re not getting hot water out of your faucets or shower but are getting cold water out of the hot water line, start by ensuring your RV water heater bypass valve is open. If it’s still in winterized mode, the tank won’t fill, and cold water will flow to both hot and cold lines. If this isn’t the problem, ensure that the propane/electric switches are turned to the on position before troubleshooting the unit. It sounds silly, but it’s easy to forget to turn them on. They may have accidentally been switched off by accident. Also, there is usually a separate switch on the unit inside the access panel. Make sure that it’s also switched to the on position.
If you have a dual propane and electric heater, both heating sources rarely stop working at the same time. However, it can happen, especially if the electricity or propane failed long ago and you never noticed because the other source worked adequately. So let’s review each system independently.
The water heater is not working when using electricity
If the electric heating element isn’t working, check the circuit breaker in the electric access panel. If it’s not tripped, it’s time to check the heater itself. The first thing to check is the hi-limit/emergency cut-off switch. This switch is a failsafe that shuts off the water heater if the water heater thermostat fails to keep the temperature below a set high limit point. This switch prevents the water from boiling and creating steam. You should have a reset button on the unit. It may be under a rubber cover alongside the propane reset (you don’t remove the cover to press it). If it tripped, you should feel it click back into place when pressed. However, your thermostat may not work correctly if it trips repeatedly and must be replaced. Replacing your faulty thermostat is pretty easy since access is right on the outside of the unit.
The other common issue with electric hot water is burned-out heating elements. These are easy to replace and test. You can usually find the heating element near the bottom of the tank. Before you test it, make sure that you turn the power off to the water heater. You will need to access the element electric supply connections by removing a cover on the heater. Once it’s removed and the electricity is off, you’ll need to remove one of the wires from the element. Next, you’ll need to use a multimeter set to Ohms, which will measure resistance. A functional element will have at least 10 ohms resistance when testing a standard unit. To test, touch one test probe of the multimeter to one of the power supply legs and the other to the second one. If it reads right around 10 Ohms, the element is fine. If you do not get any resistance, you have a bad heating element, and you’ll need to replace it. If you have a larger or non-standard water heater, check the owner’s manual to see what your Ohms reading should be.
To troubleshoot a little further, if none of the above works, you can test the water heater switch located on the unit. Keep the multimeter out, as you’ll need it again. Remove the switch and disconnect the wires. With the switch moved to the on position, you should show some resistance when set to Ohms. When it’s switched off, your Ohms reading should be zero. If you get zero when the switch is on, you have a bad switch and need to replace it.
The water heater is not working when using propane
Testing for propane problems is easier than electric problems since fewer components can fail. To start let’s start by checking the easy stuff. First, do you have propane in your tanks, and are the valves open? Also, check both tanks and manually switch the propane tank change-over switch since these can sometimes fail. An easy way to check your propane supply is to turn on the stove and let it burn for a while. You should have an adequate propane supply if it doesn’t go out. If you have propane, the first place to inspect it is at the ignition source for the RV water heater.
You should see a switch on your RV control panel if you have an electric ignition source. Make sure that it’s turned to the on position. You can skip this step if you have a manual pilot light, which isn’t common in newer RVs.
One problem that can cause a propane system not to stay lit or ignite is a dirty orifice. The orifice is where the propane flows into the burn chamber to create the flame. If it’s dirty or sooted up, you can clean it and loosen any blockage in the orifice. You can find this at the end of the gas supply tube on the water heater.
With an electric start system, you want to see if the burner light goes out, tries to light, doesn’t, or won’t spark. Electric ignition systems on RV water heaters will produce a spark, which you should be able to hear when you’re near the water heater. It sounds like a series of repeated fast-paced clicks, If you don’t hear a sparking noise, your unit won’t light, and you may have a bad igniter or problem with the circuit.
First, check the fuse for the water heater. If the fuse is bad, then you likely found your problem. However, if your fuse is good, the problem is at the igniter. So before you replace it, inspect the igniter for loose wires and ensure they’re frayed. You can also check the igniter for continuity to see if it’s a problem, but if the 12-volt wire connections are in good shape and have secure connections, you most likely have a bad igniter.
If the igniter is sparking and it’s still not lighting, enlist the help of a partner. Physically go out to the water heater and have the person inside run hot water, which should cause the water heater to try and start. Can you see a spark when it clicks? If you don’t, the igniter may be grounding out before creating the spark. You may have a loose connection or exposed wire.
Solving problems with manual light water heaters (pilot light)
If you used your water heater previously, you should know if your unit has a pilot light because you need to light it each time you go camping. The pilot light should stay lit as long as your unit it’s connected to a propane source. However, like any small flame, it can go out. So first, you should check to ensure your propane supply is on and l providing gas. Next, check your propane tanks and gas line, and make sure the valves are open.
When you go to light the pilot light, if it continues to go out when you ignite it as you normally do (waiting for a few seconds before releasing the light knob), you may have a bad thermocouple. The thermocouple senses the temperature of the pilot light and will tell the unit to supply propane to keep it lit. If it fails, propane won’t flow to maintain the pilot light, and you will get a pilot outage. It’s an inexpensive part and easy to replace.
If you see water dripping from my water heater access panel. What causes that?
All tank water heaters have a relief valve, which safeguards against pressure buildup from the steam in the tank. Relief valves are designed to eliminate this pressure automatically. However, it’s not unusual to see them leak some water when working properly. If it’s excessive, you may have an air bubble in the tank. This problem is easily fixed by letting the water cool and manually opening the relief valve until water comes out. You may also want to lower the temperature setting on the RV water heater, which should correct the problem.
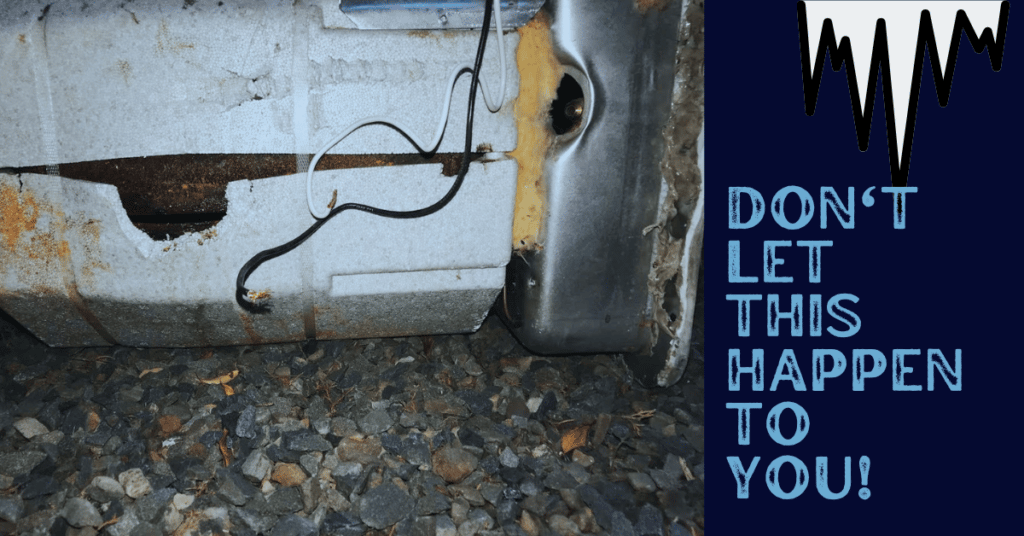
Your RV water heater tank is bulging:
This problem is a sign of freeze damage. Did you forget to drain your RV water heater at the end of the season? It is probably time to replace it if it’s bulging since its structural integrity may be compromised.
What does it mean when the small light is illuminated next to the gas switch on the indicator panel?
The small red light, which may read FLR or DIS, is an indicator light to inform you that your RV water heater tried to ignite but didn’t. If it stays lit, you may have repeat faults. However, it may simply indicate that you’re out of propane, but it can also signal an issue with the ignition system. You can reset it and try again by hitting the reset on the water heater.
Your RV tank water heater is making strange noises
Popping sound: If you’re hearing a popping or crackling sound from your water heater, it’s probably due to scaling. Scaling results from minerals forming in your tank and attaching to the heating element. When water gets trapped behind this scaling and the heating element kicks on, it will heat up, boil, and pop out from behind the scaling buildup. So what’s likely happening is that liquid is getting trapped against the heating element.
If you hear this- it’s probably past due for a tank cleaning. You can follow the instruction in the maintenance section above. However, if the scaling is bad and the descaling treatment doesn’t work, you may need to remove your heating element and try cleaning it separately. You can soak it in a descaling cleaner or vinegar solution, but you may have to replace it, which is an easy and inexpensive DIY job.
Singing or whistling sound: If you’re hearing what sounds like a whistling noise, or some people describe it as singing noise, there are a few likely culprits. The most common problem is scaling buildup on the heating element if you’re using the electric heating element (similar to the popping sound problem). If the heating element is heavily coated with mineral buildup, the heating element can hum and make strange noises. You’ll have to clean your heating element by descaling the system. You can also remove and clean or replace it if it’s too far gone.
A whistling sound can also come from air or steam escaping the water heater, just like a teapot. This sound can sometimes come from the drain plug if it’s not secure. It may also be coming from one of the connections on the back of the water heater. Tightening up these connections may solve your problem. An unlikely scenario, but still possible, is a small crack in the tank. Even a small crack can cause air to release and make a whistling sound.
Air is not hazardous, but steam can be. Your water heater shouldn’t get hot enough to produce excessive steam pressure. You should not ignore this if it’s coming from the pressure release valve. This pressure valve is a safety device that allows steam to escape when the unit overheats. If the pressure relief valve malfunctions, there is no way to release pressure in the form of steam. If your water heater produces hot water above the high limit cut-off, typically 130 degrees F, there is a problem. So, if this valve is frequently whistling, you should have a professional inspect your water heater to avoid dangerous accidents. Too much pressure is not a good thing.
Loud roaring sound or black soot by the water heater panel: This scenario is most likely a problem with the propane burner that you should address as soon as possible. It’s a sign that your propane burner is running too lean or has too much air. If you want to do a fun little experiment, slightly blow on the flame the next time you start your gas cooktop burner. You should hear a slight roar. This scenario could be happening in your water heater- getting too much air.
Luckily, it’s usually an easy fix that you can do yourself. First, you’ll need to adjust the airflow to your propane burner in the water heater. I recommend watching a YouTube video if you haven’t done this before. It’s easier to see a correct-looking flame than read about it. However, the key thing is to remember is that the flame should be mostly blue. Too much or too little oxygen will cause your flame to be mostly yellow or orange.
You should see an adjustable sleeve on the fresh air intake line, which you can reposition by loosening a set screw on your water heater. It’s possible that the screw came loose, and the adjustment is out of whack. By loosening this screw, you can adjust the sleeve to increase or reduce the fresh air supply to the main burner. Simply adjust it to get the right flame color and height. Too much oxygen will cause your flame to roar and be blue with yellow and orange, and too little oxygen will cause your flame to be mainly yellow. If you have too little oxygen, your burner won’t burn clean and may cause sooting, which is noticeable by a buildup of black soot above the exhaust port outside your RV at the water heater access panel. You want to have a nice blue flame in the burner tube.
The water smells like rotten eggs
If your RV smells like rotten eggs, the source is likely related to one of two issues. First, if you notice a bad smell when using hot water, it’s likely coming from your RV water heater. Anaerobic bacteria, while not dangerous, can react to the magnesium or aluminum anode rod in your RV water heater. Now is an excellent time to clean your RV water heater and replace the anode rod. First, drain the RV water heater after it cools down and flush out any buildup in the tank. It may take a few rinses to get it clean. Next, you will flush your water heater with peroxide, a germicide. For a six-gallon heater, you will use 16 ounces of hydrogen peroxide. With the water heater tank empty, use a funnel to pour the hydrogen peroxide into the anode rod plug in the water heater. Replace the plug and fill up your water heater. Don’t turn the water heater on when doing this.
Next, the best solution is to let the mixture sit in the tank for a few hours. The disinfection happens quickly but waiting a bit will help ensure that it’s fully clean. After you drain it, it’s time to install the new anode rod. After that, fill the water heater as usual and turn it on. You should b free of the rotten egg smell.
Adjusting the temperature of your water heater
On some water heaters, you will have a temperature control knob. However, others do not have this option and use a set temperature for the water. Read your manual to see if your water heater has an adjustment. However, your water heater should not exceed 130 degrees in most instances. If your water temperature is above this or extremely hot, you should check your water heater’s hot water shutoff switch.
However, suppose you simply like cooler water. In that case, some people get around a water heater without an adjustment knob by slightly opening up the water heater bypass valves that you use to winterize your RV to allow a little extra cold water to mix with the hot water.
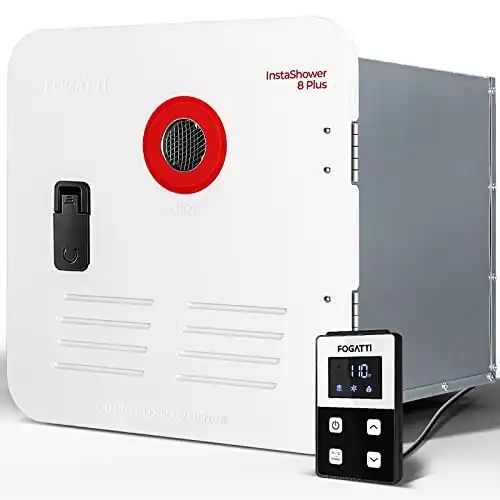
Tankless Water Heaters
In recent years, tankless water heaters have been becoming more popular. No longer are they only options for luxury RVs. New mid-range RVs are now beginning to offer these as standard. Additionally, the market is full of aftermarket options that RVerss can purchase to replace their tank water heater system. The primary benefit of a tankless system is that you get an endless supply vs. a tank with a set capacity since it supplies on-demand hot water.
While tankless systems are great options, they’re not free from problems. However, if you understand how it works, you can fix many problems if they arise. A tankless system works differently than a tank RV water heater. Instead of heating a tank full of water and storing it, a tankless system uses a very hot flame that heats water through several steps as it passes through piping and a heat exchanger. Essentially, it’s simply heating the water running through the line you’re requesting from the hot water faucet or shower. For this reason, they can be more efficient than a tank system.
For the most part, tankless RV water heaters will only use propane. This setup eliminates some of the troubleshooting steps associated with the electric heating element. However, tankless systems can be a little more complicated to service. They may have new technologies, an advanced control board or circuit board, and many operating components enclosed within the unit.
Tankless RV water heaters are available from many manufacturers, so troubleshooting and servicing are difficult to generalize. The best resource for your tankless water heater is the operating manual that comes with it. However, there are some more universal items that we’ll describe below. Let’s start with maintenance.
Tankless water heater maintenance
Tankless water heater maintenance will be different from a tank system. One of the benefits is that you don’t need to empty the water heater like a tank, and there aren’t any special bypass steps when winterizing your RV. However, in addition to what your owner’s manual states, there are some basic annual maintenance steps you can take.
Just as you would with a tank system, give the unit a good visual inspection throughout the year. Ensure that your seals between the tank and RV wall are secure and free from cracking or peeling. If not, touch up with some caulking. Inside the tankless water heater access panel, keep it clean, removing any debris, dead bugs, or gunk that builds up in there. Finally, check the burner unit for soot built up. It signifies that your system may be burning too rich and needs adjustment if you notice it.
Like a tank water heater, your tankless system can experience a buildup of mineral deposits in its heat exchanger. The best way to prevent problems is to clean it every year. You can buy commercial products to do this, but a 50/50 mixture of vinegar and water works well. Since you can pour this mixture into a water heater tank, you’ll need to pump it just as you would antifreeze when winterizing your RV. Again, you’ll want to let it sit for several hours or overnight before flushing it out of the system. It’s worth repeating one more time. Consult your tankless water heater’s manual to see if other recommended steps are needed to service or maintain your system.
Common RV tankless water heater problems.
While tankless RV water heaters solve the problem of running out of hot water, they’re not free from issues. Below are some common tankless water heater problems experienced by RV owners and tips for solving them.
Water is getting hot and cold when in use.
This problem is most likely caused by the water supply. Some tankless water heaters won’t operate correctly unless there is a steady stream of water. Since the heater turns on when you call for water, there can be a very short period where water flows right before it heats. For example, if you turn the water on and off during a shower, the water heater will turn off. When you turn the water back on, you can get an uneven temperature flow out of the water heater. The best solution is to keep the water running as you use it, especially when showing. Otherwise, you can experience this problem.
Water is not hot enough or uneven.
All tankless water heaters have a flow rating, meaning that it’s rated to heat water as it flows through the unit. If you have high water pressure, you may be pushing more water through the water heater than it can adequately heat. Newer models are usually able to handle more flow. An easy solution is to lower the flow rate by installing a water pressure regulator or adjusting the faucet to slow down the amount of water you’re using.
The tankless heater is failing to light.
Just as with a standard tank system, the propane supply is the first thing to check. Are your tanks full, and are the valves open? The power supply is the next thing to check if the answer is yes. Next, inspect the fuse for the igniter; if it has blown, replace it.
All tankless water heaters will also have a fault mechanism. If the system fails to light after several attempts, it will lock, and you’ll need to reset it manually before it tries again. Again, consult your owner’s manual to see how to do this. If you still can’t solve the problem, you may have an issue with the igniter, a wiring problem, or a loose connection at the water heater or the electric panel.
Final Thoughts
RV water heaters may be one of the most underestimated appliances in your RV. However, when they’re not working, you realize just how much you rely on them. The good news about RV water heaters is that they are very durable, and most issues can be solved without the need to make a technician call. If you take a little time to learn about your RV water heater, maintain it throughout the camping season, and repair problems as soon as they emerge, it will last you a long time.
Also, for those seeking expert assistance in RV water heater troubleshooting, don’t hesitate to consult a reputable source like RV Repair Club. Their team of experienced professionals offers detailed guides, helpful tutorials, and one-on-one support to ensure your RV adventures remain uninterrupted and comfortable. Trust RV Repair Club for reliable, efficient solutions to all your RV water heater concerns.