
As an avid RVer who has faced various water system challenges, I’ve had my experience with RV water problems and maintenance needs for the various components of the RV fresh water system, including the water storage tank, city water connection, water lines, water heater, and water pump. In this article, I’ll walk you through common issues and their solutions, focusing on both city water connections and tank-fed systems. Whether you’re dealing with high water pressure or malfunctioning components, this guide is designed to equip you with the know-how to resolve most problems efficiently.
If you’ve ever experienced a water problem while camping, you know it can be a significant inconvenience. There are two types of RV freshwater systems: city water and water supplied from your holding tank by the 12-volt water pump. A city water connection is usually trouble-free. On the other hand, when you rely on your RV water pump and holding tank, you add more components to the system and, conversely, more points for something to malfunction. Regardless, you can fix most of the water problems with a little know-how.
Some of the most common problems RVers experience in an RV include the following. Here are some quick solutions to solving them.
For fastest results, check out the table of contents and jump to the section for your specific problem:
Let’s first take a look at the freshwater system and some of the issues that you can encounter:
Troubleshooting RV City Water Connection
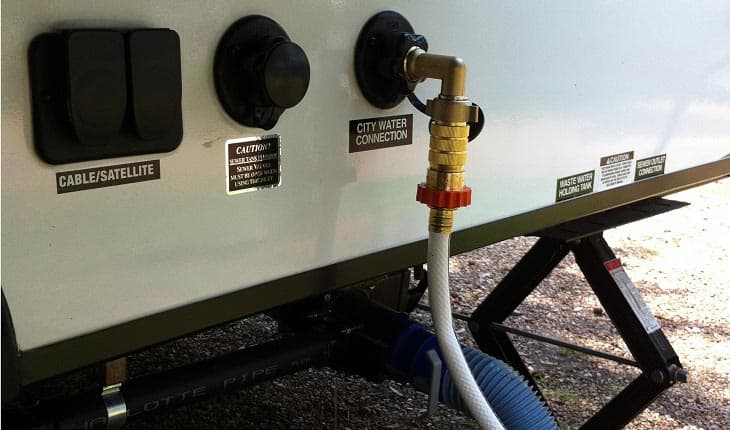
A city water connection will provide water when a hose is connected from the RV to an outdoor spigot. The water pressure from the supply provides the water pressure in your RV. Some of the more common problems experienced when connected to the city water involve high or low water pressure. Too much water pressure can damage your RV plumbing, while too little can make it more challenging to shower, wash dishes, and flush your toilet. While you typically can’t do much about low water pressure, easy solutions exist for fixing high water pressure.
How do you fix high RV Water Pressure?
High water pressure is a simple problem to solve. However, if camping at a site with high pressure, you should address it, so you don’t damage your plumbing system. Luckily, you can quickly resolve this by installing a water pressure regulator between your RV and the water supply from the campground. While most modern RVs can handle pressures up to 100 pounds per square inch (psi), you should keep the pressure no higher than 60 psi. For less than $10, you can purchase a water pressure regulator that automatically maintains the pressure within a safe range. If you spend a little more, you can buy an adjustable regulator to set the pressure to your desired level (up to the highest pressure from the supply line). Installing a pressure regulator should be one of the first things you do when you buy an RV. I don’t know why new RVs don’t have them built in.
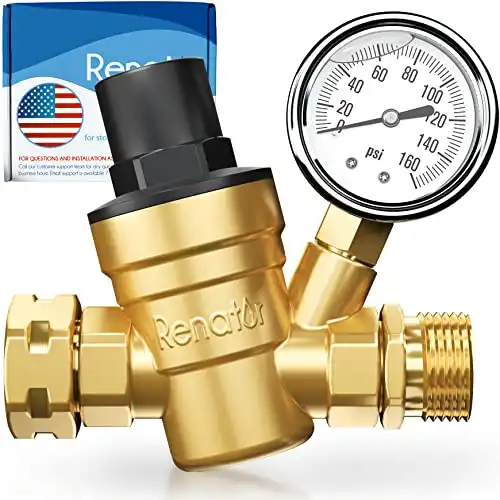
If you don’t use a regulator, you risk damaging your RV’s plumbing. A worst-case scenario can be a busted pipe or disconnected joint, causing a flood inside your RV. Maintaining safe pressure is the best way to prevent this. When you leave the RV, it’s also a good idea to turn off the valve at the spigot, just in case something goes wrong.
How do you fix low RV Water Pressure?
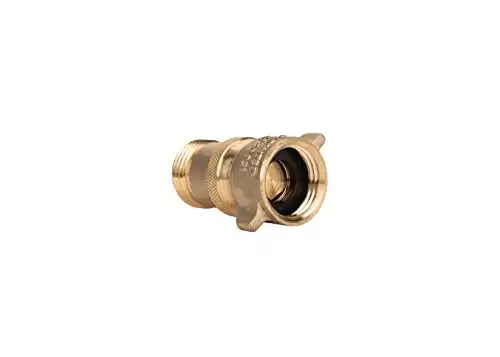
While there is little you can do about low pressure, there are a few things to check. First, make sure that the spigot valve is all the way open. These valves get a lot of use and can stick, giving you a false sense that it’s all the way open. Also, check your hose for a kink. A kink is likely the culprit if you don’t have enough pressure, assuming you have an adequate supply. A kinked hose will reduce water flow or stop it together. Always try to layout your hose as straight as possible when connecting to city water. Additionally, using a shorter hose will reduce the likelihood of a kink.
What do you do if the RV Water isn’t working (or has low flow) at one faucet?
If you’re experiencing water issues at one of your faucets but it’s okay elsewhere, the most likely problem is a clogged screen filter. This scenario is a common problem that many RV owners experience. Water from the campsites can have hard water, which causes mineral buildup in the plumbing. This hard water usually isn’t an issue, but the screens on the faucet heads can get clogged. It’s especially true after an RV sits for a while unused. The simple fix for this is to unscrew the metal or plastic ring on the end of the faucet (where the water comes out) and inspect it. Light scrubbing and rinsing will usually clean it right up if it’s dirty or covered in a mineral building.
How to prevent RV Water lines and hoses from freezing?
We all know that water and winter don’t always work well together. You risk water freezing when temperatures dip below 32 degrees Fahrenheit (0 degrees Celsius). A frozen hose, pipe, or water pump can prevent water flow. Worse, it can split your RV plumbing lines, causing a leak only noticeable when it thaws. Preventing frozen pipes is your best solution.
If camping in freezing temperatures, you must take precautions. While a nighttime dip below freezing won’t typically cause issues, an extended period of freezing temperatures most surely will. Some manufacturers build RVs that can handle this better than others. For example, if you have a sealed underbelly, your RV plumbing may receive heat when running your RV furnace. If you’re camping in the winter, but use an electric space heater instead of the furnace, the underbelly, where most of your plumbing is located, won’t receive heat and will be more prone to freezing.
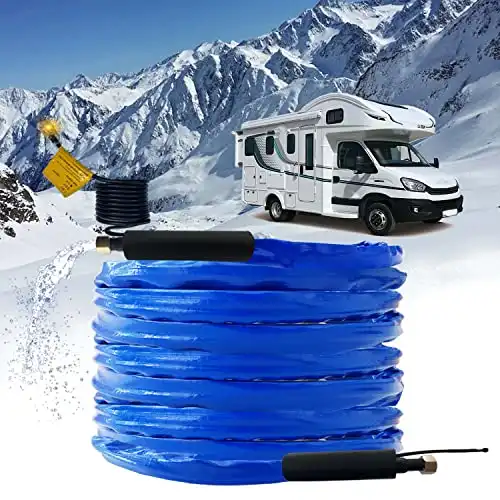
Another consideration during freezing temperatures is your water supply line (hose). Since this hose is exposed to outside elements, it will freeze faster than inside plumbing. You can purchase a heated hose, which works well in preventing it from freezing. If you don’t have one, you can always disconnect your hose and bring it inside when the temperature drops.
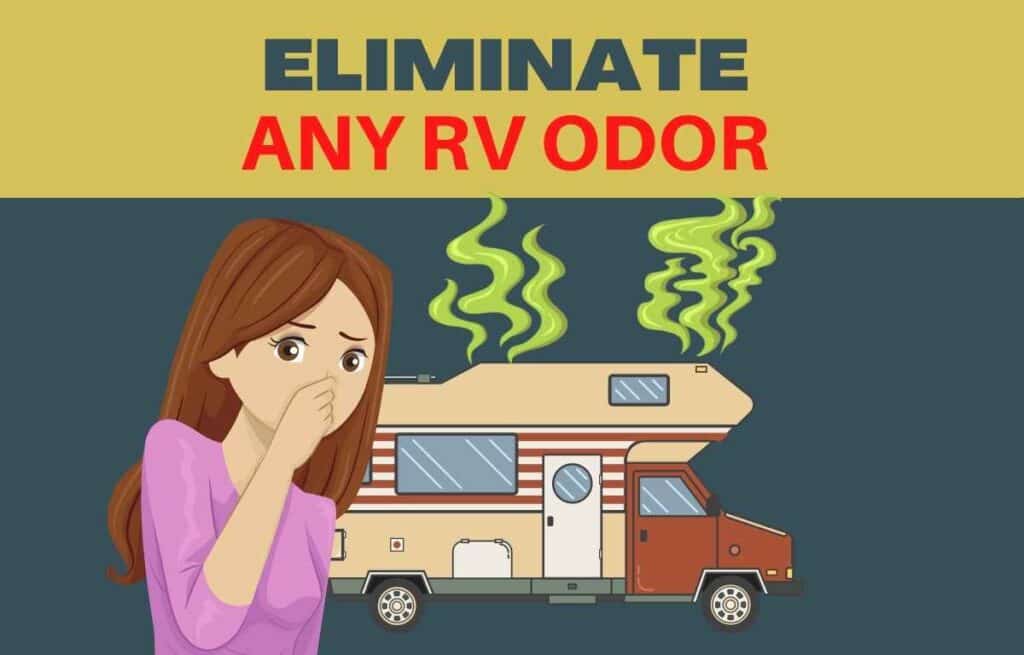
How do you Fix smelly water in your RV?
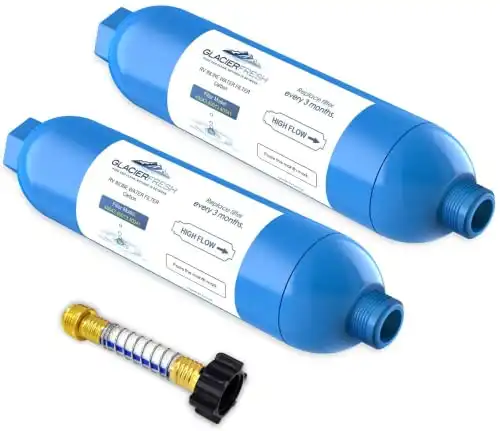
If connected to city water, the most likely cause of an unpleasant smell is the water itself. While it’s likely safe to drink, water can have slightly different odors or tastes. The easiest solution to this problem is to purchase an inline water filter, which installs between the outdoor spigot and your RV city water connection. These filters are inexpensive, work well, and should improve the taste and odor of your water. However, an inexpensive inline filter is disposable, and you’ll need to replace it when you notice it’s no longer effective.
If you’re getting an odd smell from your fresh water tank, you may need to sanitize it. It’s a good idea to do this annually regardless of odor issues. While you can buy sanitizing chemicals, you can also use a quarter cup of bleach for every 16 gallons of water. So, for example, in a 30-gallon system with a 6-gallon water heater, you’ll need a little over half a cup of bleach.
First, you’ll want to drain your water system. Ensure you turn off your water heater, which you don’t want to run empty after you drain it. Once drained, pour the correct amount of bleach into your holding tank from the outside. Proceed to fill up the tank until it’s all the way full. Next, run the water throughout your RV to sanitize your lines. Run the water at each hot and cold faucet until you smell bleach in the water. The hot water will take a while to run while the water heater fills. The next step is simple- wait. When thoroughly sanitizing the system, it’s best to let the water sit for 12 hours. If you’re doing this while camping, it’s easiest to let it sit overnight when you don’t need water.
After it sits, you’ll need to drain the entire system again. Once it’s empty, refill the water tank with fresh water and run all faucets until you no longer smell bleach. You may need to flush the system more than once until the bleach smell is completely gone.
Fixing Freshwater tank and RV water pump problems
One of the great things about RVs is their versatility. You can connect them to the grid and have access to a fresh potable water source, electricity, and sewer. However, your RV can also do that when you want to get off the beaten path. The RV freshwater holding tank and water pump can provide you with water for your daily needs. Learning how this system works and a little troubleshooting know-how will keep your faucets running and showers hot. Let’s take a look at some of the common issues with this system:
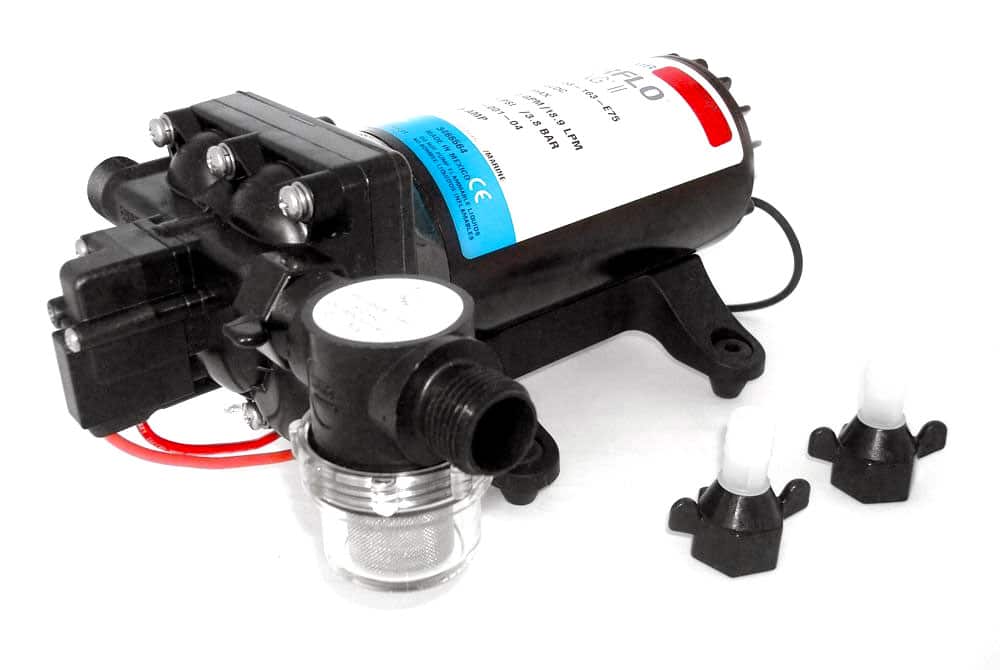
When using your storage tank and water pump to supply your water, you’re relying on your RV battery to push water throughout your RV. RV water pumps are pretty robust, but they can experience malfunctions. Troubleshooting a water pump and tank-supplied water is relatively straightforward. Below are some common problems:
How do you fix a freshwater tank that fills when connected to city water?
While this may seem confusing, especially if it happened out of the blue, it should be easy to fix. If you’re experiencing this problem, you’ll likely see water flowing out of the freshwater tank overflow while connected to city water. This scenario is often due to a stuck check valve in your water pump. A check valve prevents water from backflowing into the freshwater tank. If the valve sticks, there is nothing to stop the backflow of water, and it will fill up your tank and overflow until it’s turned off. An easy fix, which works for most situations, is to run the pump for a few minutes. Running the pump should dislodge the stuck check valve and prevent water from backflowing into the tank. If this doesn’t work, you may need to replace the check valve in your pump.
Another cause can be a damaged valve on your water control panel. This situation will only occur if you have a multi-valve on your water control panel, where you can select city/fresh/winterize modes. However, the most common scenario is a stuck water pump check valve.
How do you fix an RV water pump that doesn’t turn on?
When your water pump doesn’t turn on when you call for water from your faucet, the most likely culprit is that your pump is not getting power. Troubleshooting this is not too difficult. First, check to make sure that your switch is on. If you have a lighted switch, make sure it lights up, indicating that it has power. Next, check the fuse. Look in your electrical breaker/fuse panel and find the fuse labeled water pump. Inspect the fuse and make sure that it’s functioning. Replace the fuse if needed and retest the pump.
The next step is to check your 12-volt power. With a multimeter, check your battery to ensure it has a charge. Also, check your RV’s battery connections and other 12-volt equipment to see if they’re working. If the battery checks out and you have adequate 12-volt power, it’s time to move to the pump.

Your RV pump will have two wires coming out of one end- a hot and neutral. You should also see a separate set of hot wires from the front of the pump for the pressure regulator switch. Check for loose connections, which can occur from the water pump vibrating when in use. Make sure that the wires aren’t frayed or broken. After you make any adjustments, try the pump again.
If it’s still not working, the next step is to test the water pressure regulator switch. Two additional positive wires should be attached to the front of the pump. If the switch is bad, it will cut off power to the pump. Testing the switch is easy. Remove both leads from the pressure regulator switch and connect the metal clips together. You may need to use a small wire or tool to do this. If the switch is on and the pump kicks on when connected, you know your pressure regulator switch is the problem. It’s inexpensive and easy to replace.
How do you fix an RV water pump that is performing poorly?
If your water pump is working, but the pressure is low, you can check a few things. First, make sure that it’s getting enough power. A bad or low battery can be the culprit. If the water pump isn’t getting a steady power supply, it won’t be able to give you constant pressure, and it will eventually stop working. This problem happens because the pump runs off of the 12-volt power supplied by the battery. You will want to check your battery’s charge if not connected to shore power. If you are connected, it’s possible that your battery is failing or you have a problem with the converter (less likely). To troubleshoot this problem, the best place to start is by checking the voltage of your RV battery. If it’s low, you may have found your problem.
You should also check your wiring. Sometimes the vibration of the water pump can loosen the wires, which can cause the pump to appear to be straining when it’s simply intermittently losing power when the wire loosens up. But, again, this is an easy fix.
Another solution to this problem could be a water pump pressure setting. While there are dozens of different water pump models in RVs, some of them will have a pressure adjustment screw. If you look at the water pump, you can quickly identify the model number and find the manual for it online. If you have an adjustment option, try to increase the pressure and see if that improves things.
How do you fix an RV water pump that runs but doesn’t pump water?
If your RV’s water pump is running, but you’re not getting any water, don’t panic. The most common reason are a simple fix. First and foremost, check to see if you have water in your tank. You won’t be the first person to overlook this. The tank’s drain plug or valve under the RV can sometimes be left open, draining your tank. If your tank has sufficient water, the next step is to check your valves.
If you’re starting the pump up for the first trip of the year, you may have a valve closed from winterizing the camper from the previous season. This situation is also true if you have a new RV and use the pump for the first time. Many RV setups will have a winterization setup at the pump. This setup allows you to pull antifreeze from a bottle, run it through the pump, and into your water lines. Simply closing this valve and opening the one to your water tank will fix this problem. If the pump doesn’t have access to water, it won’t be able to pressurize, and the RV water pump keeps running.
Another common problem can be your hose connections. Check to ensure that you don’t have any kinks in your hoses attached to the pump. If the pump is in a tight space, the installers might have squeezed the hoses in there and created a kink, which can prevent water flow.
If the above doesn’t work, it’s now time to inspect your lines. First, check if you have the same issue with faucets for hot and cold water valves. If it’s only happening on the hot water, you may have bypass valves closed near the water heater. If isolated to one faucet, you may have a clog in the faucet screen.
Next, inspect any water lines and look for leaks or broken pipes. Also, check under the RV to see if water leaks from the underbelly. If you find a leak, busted pipe, or disconnected joint, you’ll need to fix it.
If everything checks out and you’re still not getting water, the next step is to check the pump. A common problem is the inline water filter on your pump. You may have one installed right near the pump inlet. This can get clogged and prevent water flow. If this isn’t an issue, continue to check the pump itself. For this step, you’ll want to have a helper. With the water pump switch turned off, disconnect the pressure line (the outflow hose) from the pump. Get ready with a towel. Ask your helper to turn on the pump briefly. If the water pump starts to spit out a steady stream of water, you know the issue is located somewhere after the pump. If you get no water, the problem is between the water tank and the pump. If you get a trickle of water, the problem is likely your water pump.
If you determine that you have a malfunctioning pump, you can choose to replace it or try to repair it. Many pump components are repairable. If you’re handy, you may consider disassembling the pump and see if you can identify the problem. Replacing a water pump head is much less expensive than replacing the entire unit.
What do you do if your RV water pump kicks on and off?
If your RV water pump cycles on and off when you’re not using water, it means you leak somewhere. This is one of the most common issues people face when running off a water pump. The pump will repressurize as water pressure drops due to the leak, which is why you hear the pump noise. To fix this problem, you need to find the leak. The most common place for a leak is a valve or joint. Check all your pump fittings and look under the sinks, showers, faucets, , water heater, and shower heads (don’t forget the outdoor shower) for signs of a leak.
How do you fix a noisy RV water pump?
Noise is probably the biggest problem most RVers will experience with their water pump. Water pumps can be noisy, but they shouldn’t be excessively loud. When your water pump runs, you will likely be able to hear it making a growling and gargling sound. However, many RV manufacturers install the pump in an enclosed area, dampening the noise. So, depending on the location of your water pump, the noise will vary.
Sometimes, the water pump is installed poorly or has come loose, and the vibration can cause excessive noise. Many water pumps will have rubber feet that serve as small shock absorbers. Others are screwed directly to the floor. Inspect your water pump’s installation and watch it as it runs to solve vibration noise. You should be able to diagnose the cause of the noise relatively quickly.
You can typically fix this problem by tightening up the mounting screws if they’re loose or installing a rubber base if it’s connected to the bare floor. A piece of rubber matting can make a big difference. Another good way to lessen pump noise is to install longer hoses to the water pump. Short hoses can create a more rigid setup, leading to more noise. You can purchase a silencing kit containing longer hoses and fittings for connecting your pump. Also, check to ensure that there isn’t something coming into contact with the water pump, which can also vibrate when the water pump runs.
Another solution, if the sound of the water pump is just too annoying, is to soundproof the enclosed area. For example, you can install foam padding on the walls and top of the enclosure to absorb some noise. Ensure you leave enough airflow space, as a running pump can get warm. Other people also put insulation foam tubing around the water lines, reducing the vibration of the hoses.
Also, while it’s tempting to eliminate the water pump noise, doing so could cause unanticipated issues. When you are using water, you should hear the pump run. However, when you’re not using water, it shouldn’t run. If you hear the pump occasionally kick on when not in use, you know there’s a small leak somewhere in the RV. The sound of the water pump running is a good warning system, notifying you of a potential water leak.
If your water pump makes an unusual sound unrelated to the pump motor or vibration, there could be a few issues. One of the most common problems is that you’re running low on water. When the pump starts sucking air, it will get louder and make a different sound. This air issue can also happen if you’re using the pump at the start of a camping trip. You may have air in the system and need to bleed out the lines by opening your faucets while the system pressurizes.
Something internal may have broken if you’re experiencing a very loud clinking noise from your pump. While not common, it could happen, especially if water sat in the pump during freezing temperatures. While water pumps are typically dependable, they can wear out or malfunction. However, the good news is that you can replace many water pump parts, so resolving a bad water pump doesn’t always require replacing the whole unit.
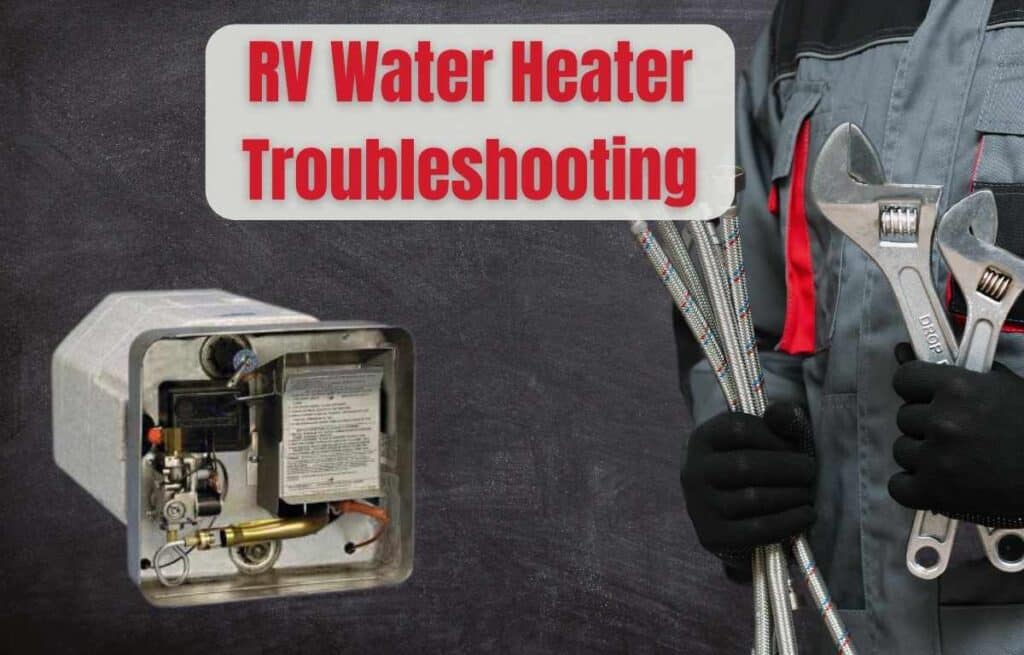
RV Water Heater Troubleshooting:
An RV’s water heater is an important appliance when camping. If you’re a little mechanically inclined and don’t mind light plumbing work, you can fix most of the problems yourself. We have an entire article on troubleshooting RV water heater problems. This covers the RV water heater tank and the on-demand system in the guide. You’ll find information on everything from dealing with lukewarm water to replacing a faulty thermostat. The guide will help you identify if you need to replace a heating element, maintain adequate water temperature, or figure out what to do if the water heater stops working. Check it out below:
Conclusion
An RV water system has many components to supply you with fresh water from a city connection or water stored in your freshwater tank. While it’s pretty dependable, things do break and will need repair. Luckily, many of the problems can be easily fixed by you without a need for an RV technician. The best thing that you can do to prepare yourself to make repairs is to know your water system. Also, don’t neglect annual RV maintenance. Keeping your water system in good shape will reduce problems down the road. If you take some time and learn how your specific RV’s water system works, you can fix most problems quickly and inexpensively.
I’m not getting water into my trailer. There are no leaks. The pump is working. I’m on city water. I checked valves houses etc. Can’t find the problem.
If you’re on city water, you won’t be needing the pump. Did you check the bypass valve at the pump itself. The best thing to do is follow the water line from where it comes into the RV and see if there are any valves that you didn’t see. If you don’t hear any water running when it’s turned on at the post, there has to be a valve closed somewhere.
Did you find a solution? Mine is doing the same thing and I cant figure it out. It all worked fine prior to moving it to another place?
Im connected to city water but none only my toilet is getting water, kitchen sink restroom sink and shower dont have any water coming out. Anyone else encounter this problem?
I would suggest checking the screens in your faucets. You may have had some dirt or debris get into the lines and clog them up. The toilet doesn’t have a screen, so that may be why it’s working.
We have water to the sinks, but none to the toilet. The floor is wet varying from damp to needing 3 towels to clean up. But it’s not wet all the time….. It’s not hooked up to city, just using the fresh water tank.