If you have used or recently purchased a Blackstone griddle, you probably know how versatile it can be. Blackstone griddles are great for serving up just about any meal that you can cook on a traditional grill but has the added benefit of cooking full meals that would otherwise require your stove and a pan. The ability to cook on a flat top grill or griddle provides you with a solid cooking surface perfect for things like stirfry, fried rice, pancakes, eggs, etc. The key to having an enjoyable cooking experience every time you use your Blackstone griddle is to keep it properly seasoned and clean.
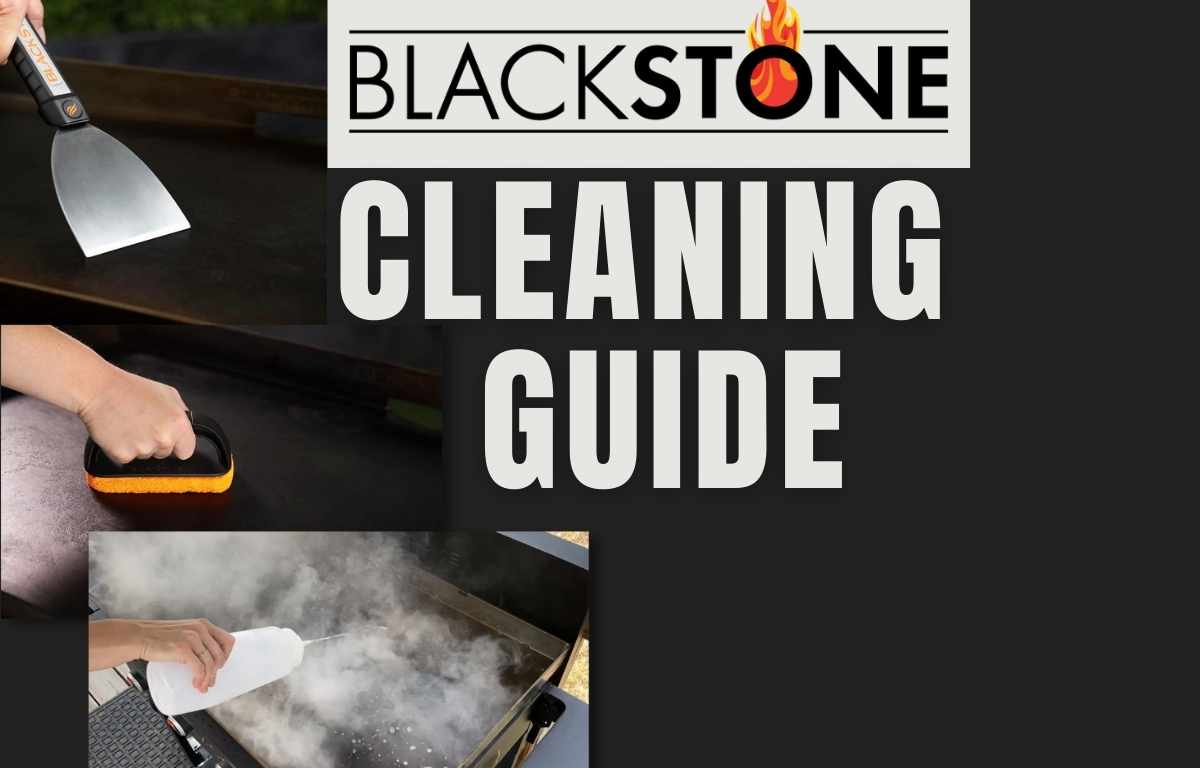
Cleaning your Blackstone griddle is easy if you follow some simple steps. Cleaning your griddle after using it should take less than 5 minutes and, if done correctly, will provide a perfect nonstick cooking surface for your next meal. Below, we’ll cover some of the best tips for maintaining your Blackstone griddle.
Blackstone griddle basics
Maintaining and cleaning it will follow the same steps regardless of what size or model Blackstone griddle you have. Even if you have a large Blackstone grill style unit, the cleaning procedure will be the same as the smaller 17-inch griddle. You can clean both propane and electric models the same way since you’re simply cleaning the flattop griddle part of the unit.
If you’ve just purchased your Blackstone griddle and are using it for the first time, you’ll need to follow the seasoning steps. More information on seasoning your griddle can be found below. You can also watch the following video to see the process from start to finish.
Seasoning your Griddle
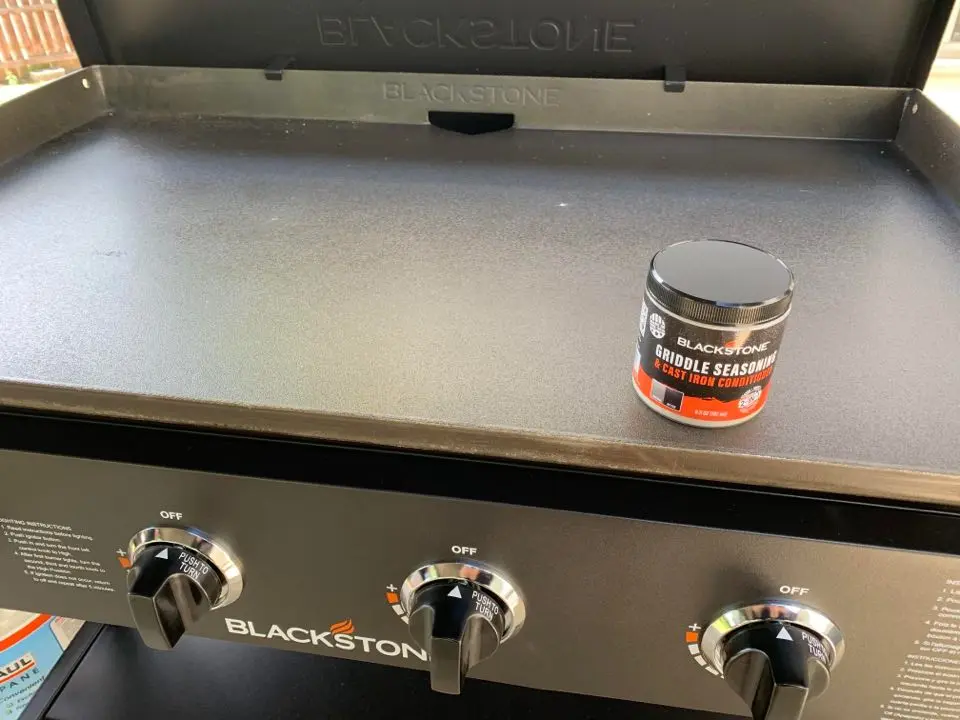
If you just bought your Blackstone or are doing a deep clean or resurfacing, you’ll need to season it prior to use. Below are some basic steps to fully season your griddle.
The most time-intensive part of getting the griddle ready is seasoning it. However, this is relatively easy and takes nothing more than a little cooking oil, paper towel, and time. One pro-tip here: Don’t skip past this step. A properly seasoned griddle will define your cooking experience. Take your time and make sure that you repeat the process at least three times. A perfectly seasoned griddle is almost completely black and non-stick, hence the name Blackstone. The first “Seasoning” layer is the most important part of getting a perfect cooktop. Set up your griddle, connect the propane, and ready your supplies to get started.
The first thing you’ll need is seasoning oil. You can use pretty much any cooking oil. Blackstone also sells a seasoning conditioner, but any oil will do (Canola Oil, Flaxseed Oil, Vegetable Oil, Sesame oil, Shortening, Olive Oil). The best oil to use is a matter of preference, but inexpensive canola oil will work just fine. You’ll also need some paper towels. That’s it- you’re ready to start the seasoning process.
Here are some easy steps for seasoning your griddle:
- The first step Ais to add 2-3 tablespoons of oil to your griddle, and using a dish towel or a handful of paper towels, rub the oil onto every inch of the griddle surface to create a thin layer (sides and back too)
- Turn up the heat on all burners. Keep the temperature high until the oil starts smoking.
- The griddle will discolor. That means the oil is bonding to the metal – this is good! This step will take 10-15 minutes.
- Before moving on to the next step, wait until the oil stops smoking, and then do it again. 2-3 tablespoons of oil, rub the entire surface with a thin layer, and let it smoke.
- After the smoke stops, do it one last time. Add oil, rub the entire surface, and let it smoke.
- Once the smoke stops, turn off the griddle and let it cool.
- If all goes according to plan, you’re looking at a black griddle top.

Cleaning your Blackstone Griddle
Depending on how dirty it is, there are several cleaning processes you may need to employ for the griddle. You’ll use the basic cleaning process 99 percent of the time. However, you may choose to do a deep cleaning, which will involve removing buildup that is hard to get off. Finally, if you have a griddle that has been neglected or rusty, you may need to resurface it. Let’s look at these cleaning steps:
Cleaning the griddle out of the box
Before seasoning it, you’ll need to give the new Blackstone griddle a quick cleaning to remove any manufacturing debris, oils, or residue. You can easily accomplish this with a pot of warm soapy water. Don’t use too much- a drop of dish soap in plenty. Then, wet a cloth (microfiber cloths work great) with the soapy water, using circular motions to release any manufacturing grime on the griddle cooking surface. Finally, ensure you wash down the entire surface, including the edges, corners, and sides. This is the only time you’ll be using soap on your griddle.
Next, take fresh water and use another towel to rinse it off. You’ll want to ensure you get all of the soap cleaned off of the griddle, as you don’t want that to remain there for the seasoning process. Once it’s clean, you can take a clean towel and hand dry the griddle or fire it up to dry out the surface. Again, you’ll want to dry the griddle to prevent any rust from forming.
Once it’s dry, you can move on to seasoning your griddle.
Basic cleaning
You should follow the basic Blackstone cleaning routine after each time you use the griddle. This step should take less than 5 minutes, and after a few times, it will become second nature to you. The important thing to remember when cleaning your griddle is that your main goal is to remove any cooking residue, create a smooth cooking surface, and ready it for the next use.
Steps for cleaning your Blackstone griddle:
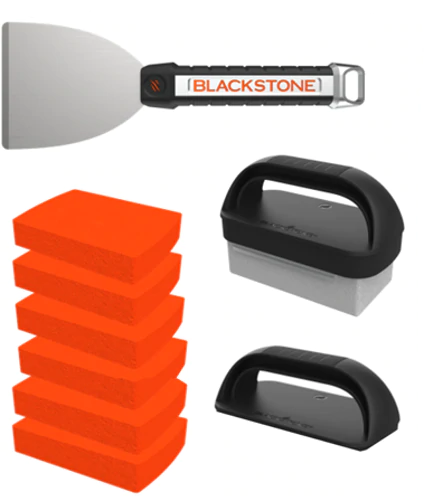
Cleaning Tools needed:
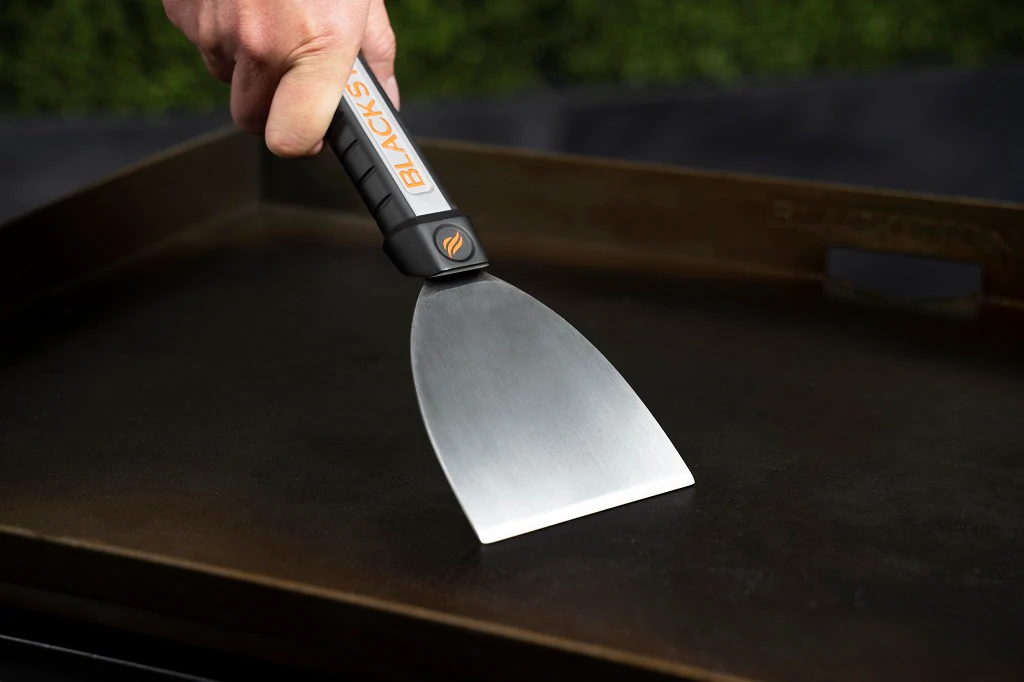
- Scraper
- Scouring pad (optional)
- Paper towels
- Oil
Regular cleaning is key to keeping your Blackstone griddle smooth, sanitized, and nonstick. I tend to think of a griddle as a large frying pan. Just as you need to clean your pots and pans after each use, you need to do the same for the griddle. However, Blackstone griddles, similar to cast iron cookware, require special care for cleaning to maintain the cooking surface.
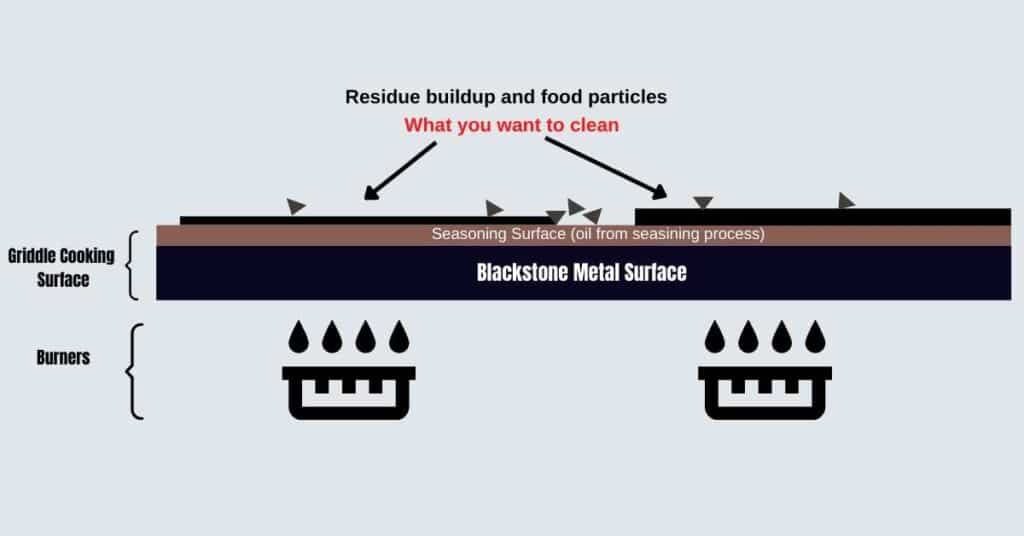
The important thing to remember for a basic cleaning is that your goal is to remove the buildup from the last cook, not scrub it down to the bare metal. You also want to proceed gently during this step, so you don’t remove the seasoning- the protective layer you first applied to the grill surface. If you look at the following diagram, you’ll notice that the cooking surface you want to maintain includes the Blackstone metal surface plus the seasoning layer, which you applied when you first seasoned the griddle..
Step 1: Remove food particles
Using your metal scraper, slipper, or even some paper towels, push any remaining excess food debris or particles to the back of the griddle and into the grease trough (opening) at the back of the griddle. Your goal for this step is to remove the leftover food from your most recent cook. Also, be sure to push off any excess grease that may have accumulated on the surface of the griddle.
Step 2: Scape your griddle
While your griddle is still warm, take your scraper and, using a uniform pressure, start at the front of your griddle and scrape off any food that may have burnt onto the griddle surface. Be careful not to apply too much pressure as you don’t want to create groves that cut into the seasoning surface. However, you should easily see the burnt residue you want to remove.
Depending on what you were cooking, you may have a lot of residue to remove or, in some instances, not much at all. I find that recipes that produce a lot of liquids or sugary marinade create more residue buildup.
Start at one side of the griddle and use a solid motion from the front to the back. Next, move the scraper over and repeat the process, ensuring that you scrape all griddle sections. You may notice that the material piles up along the rear edge of the griddle. Take a paper towel and wipe it free into the grease trap opening.
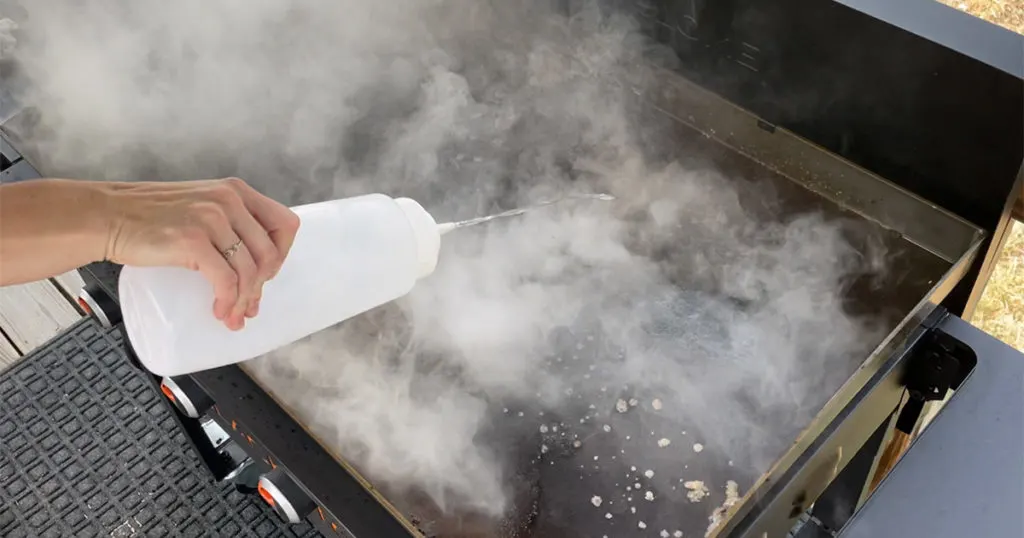
Step 4: Water and steam (optional)
Depending on what you were cooking, you may have stubborn residue and buildup that doesn’t come off easily when scraping. When you have a burnt griddle area, a simple solution is the use water and steam to help remove it. First, pour some water directly on the stubborn area when a hot griddle. Let the water boil and steam over the buildup. Then, while still moist, take your scraper and give it another scrape. If it doesn’t work the first time, repeat this process until you can get it clean.
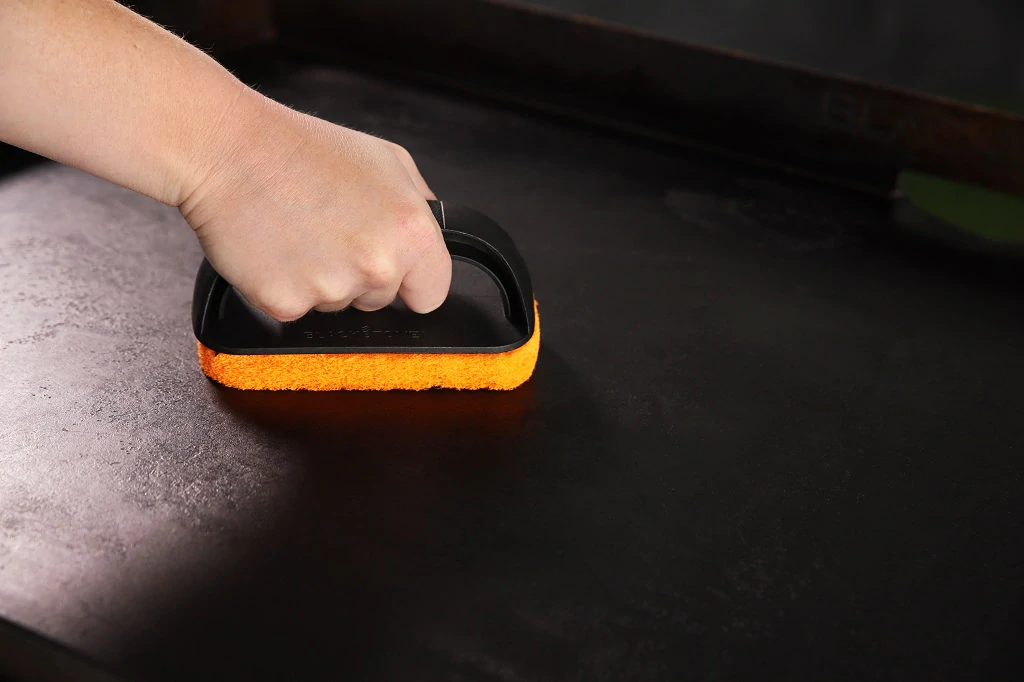
Step 5: Use a scouring pad
While this isn’t always necessary, I find that the Blackstone scouring pads help remove any small pieces of buildup that you couldn’t get off with the scraper. Using the Blackstone scouring pad, use small concentric circles across the entire griddle top. In areas where there is still buildup, you can apply some extra force to remove it. The scour pad helps create a nice, even, and smooth surface after each use.
Step 6: Wipe down your griddle
Now that the griddle is free from buildup and food particles, take a moist paper towel and wipe down the griddle. You’ll want to make sure that you wipe all edges and corners since they can act as a trap for the material you just scraped away. At this point, you should notice a nice dark and even color across the griddle surface.
Step 7: Quick seasoning
This step is optional, but it helps maintain the cooking surface. When you heat your griddle again, take a small amount of cooking oil, and spread it evenly across the surface with a paper towel. You only need a small amount of oil for this step. This step will help seal up any surface sections that may have been damaged when scraping or scouring. If you applied too much oil, simply soak it up with a paper towel.
Apply a thin layer of oil to the entire surface. Once applied, keep the griddle on until the oil stops smoking, just like you did when seasoning it for the first time. Once it stops, turn off the griddle and let it cool. Once fully cooled, it’s good to close the lid or install the cover to keep the griddle out of the elements. I like to finish the process by taking a dry cloth and giving the surface of the grill one final wipe.
Remember, the seasoning process is a life-long endeavor The more you use your griddle, the more seasoned it will become. Some natural food oils, like bacon grease, make great natural seasons that you can use to add to its protective coating.
While it may seem time-consuming, doing this should only take a few minutes to clean and oil the griddle. In addition, you’ll find that it’s quicker and easier than cleaning most pots and pans in your kitchen. A clean Blackstone griddle is a happy one.
Deep Cleaning:
Cleaning Tools needed:
- Scraper
- Scouring pad (optional)
- Lemon Juice or Vinegar
- Paper Towles
- Grill stone (for heavy burnt areas)
- Oil
Deep cleaning your griddle is not something you’ll need to do very often. If you take care to properly clean your griddle after each use, you won’t need to worry about this. However, if you need more than a basic clean, you can easily restore your surface with a deep clean.
First and foremost, stay away from harsh cleaning chemicals. They’re unnecessary and can damage your griddle surface or impart chemical tastes into your food (food and chemicals- yuck). Instead, opt for natural ingredients to help break down any buildup that you can’t remove with a basic cleaning procedure.
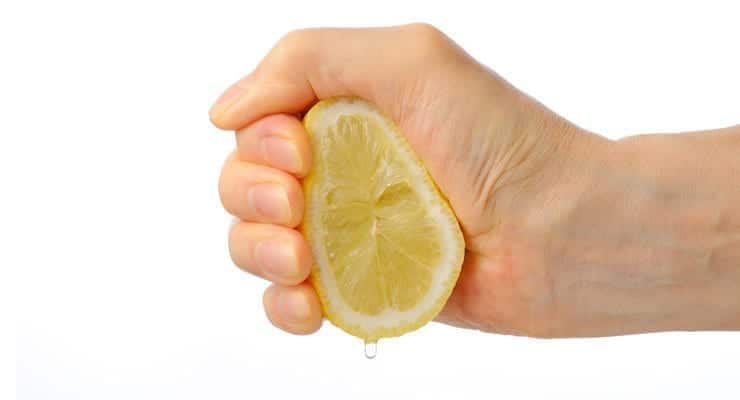
Step 1: Apply naturally acidic liquid
You can begin the process by heating your griddle to high and letting it get nice and hot. Once ready, use some naturally acidic ingredients to help loosen the caked-on materials. Lemons work great for this. Start by squeezing lemon juice directly into the hot surface. You can also add a little hot water to prevent the lemon juice from evaporating quickly. In addition to lemon juice, a cup of vinegar also works extremely well.
Next, let the lemon juice or vinegar cook on the griddle plate. This step will loosen up any residue and seasoning on the surface. To deep clean, the entire surface, make sure you have a good covering of the lemon juice or vinegar. You’ll need to let it boil on the surface and continue cooking until it evaporates.
Step 2: Scrape the griddle
Once it is all evaporated, turn the griddle off and break out your griddle scraper. The mixture should have left you with some burnt but loose material that you can scrape away. As you scrape, you’ll not only be removing some of the buildups, but you’ll be scraping away some of the seasonings that you put on when you first seasoned your griddle. You’ll be getting back to more of the original surface you started with after you first unboxed the griddle.
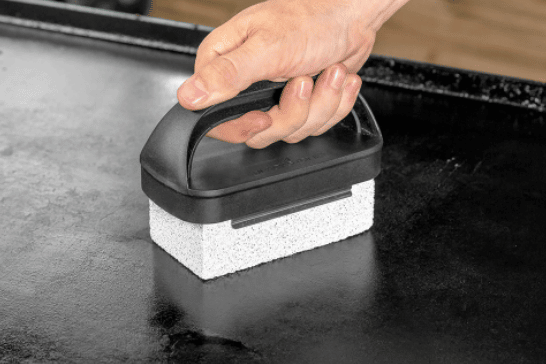
Step 3: Use a grill stone (optional)
If you still have some hard-to-remove material, you’ll need to use a little elbow grease and an abrasive material. A grill stone, which comes as part of the Blackstone cleaning kit, works great. The stone’s abrasive surface will quickly scrub away any remaining seasoning and residue left on the grill.
Step 4: Re-season your griddle
Since the deep cleaning process likely removed most of your original seasoning, you’ll need to re-season the griddle, just like you first bought it. Here’s some information on seasoning your griddle.
Resurfacing and removing rust from your griddle
Cleaning Tools needed:
- Scraper
- Grill stone
- Sand Paper, Wire Brush (optional)
- Paper towels
- Oil
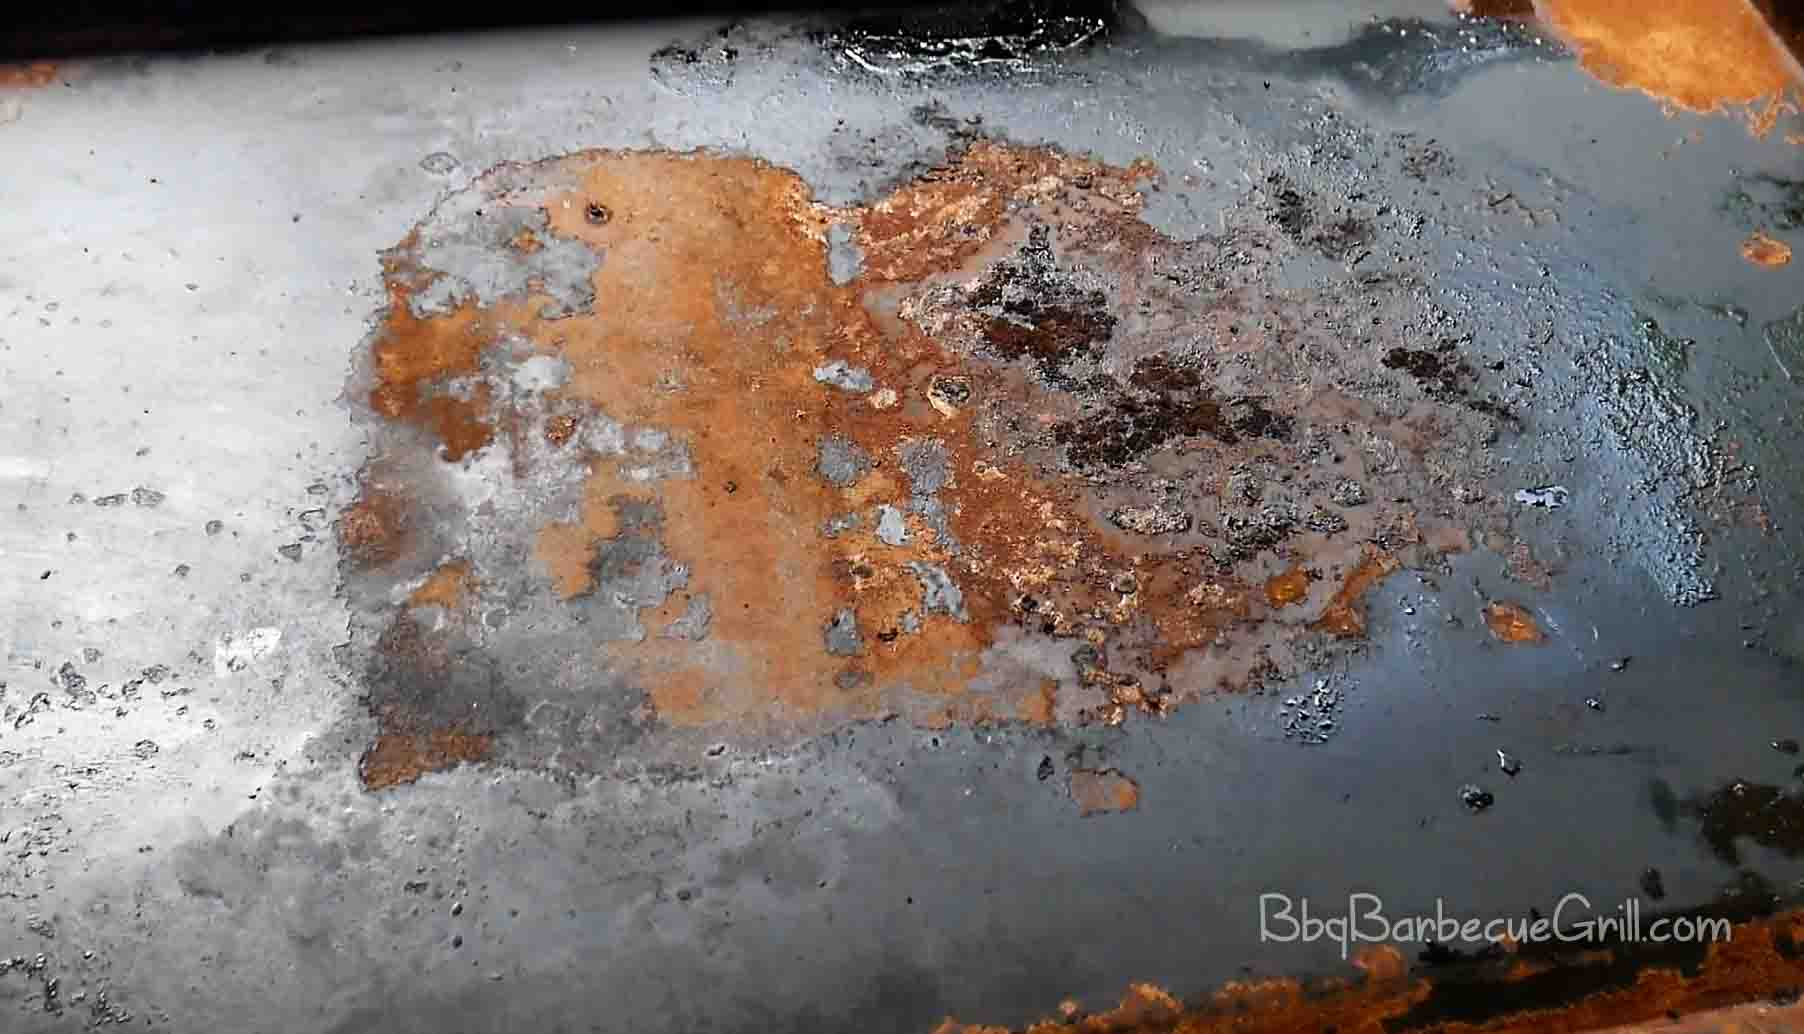
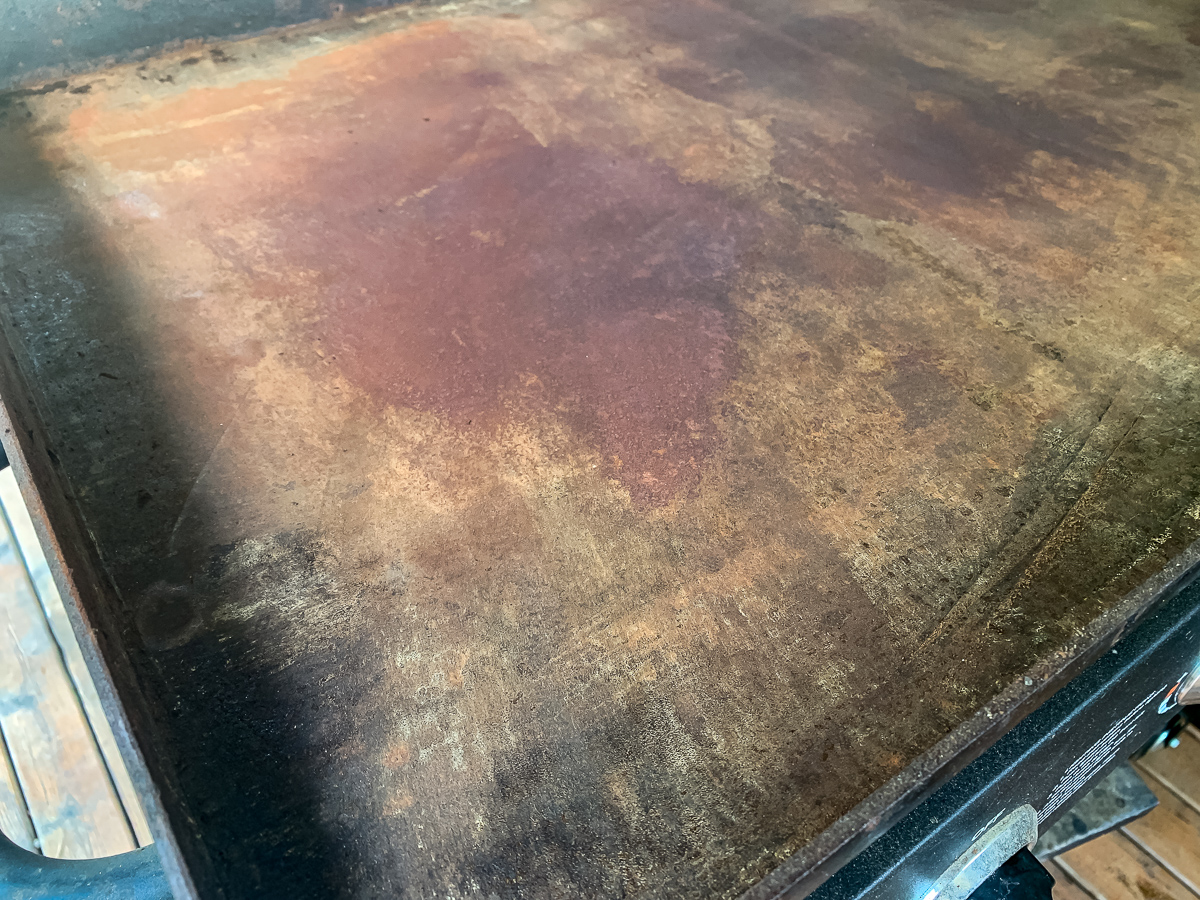
One of the most deflating experiences you may have with your Blackstone is if you prep it in the spring and see rust all over your griddle surface. You may also notice some rust begin to form if it was accidentally left out in the rain during the summer. When your griddle is well-beyond its cooking condition, it’s time to resurface it. Luckily, Blackstone griddles are nearly indestructible. So while a rusty griddle, even a severely neglected one, may cause you to think that it’s time for a new one, the good news is that you can almost always bring it back to life. Also, don’t worry if you notice a little Blackstone griddle rust after you clean it. Most superficial rust can be wiped off and protected with a little oil.
Depending on how rusty it is, you may need to get ready for some scrubbing and scraping. Here are some simple steps to clean it up:
Step 1: Apply heat
The first thing you want to do is get rid of as much of the superficial rust as you can. A good way is to turn your griddle on high heat and let it heat up. Once hot, take your scraper and begin to scrape off as much rust as possible.
Step 2: Vinegar (optional)
Depending on how much rust is remaining, you may want to break some of it down using an acidic mixture of vinegar and warm water. With a cool griddle, plug up the grease drain and pour some vinegar on the griddle surface, ensuring that the entire surface is covered. Next, let it sit for a few hours. The acidic vinegar will react with the rust and allow it to break free of the griddle surface. After it site, drain the vinegar and use your scraper to try and remove more rust.
Step 3: Scouring and sanding
Hopefully, the above steps got rid of most of the rust. However, you’ll likely still have some deeper rust that you need to remove. For this step, you’ll need an abrasive tool. Start with a griddle stone and some oil. After applying some oil to a cool griddle, begin rubbing in circular patterns across the griddle surface with the grill stone. The goal is to remove as much of the surface buildup as possible, including rust and seasoning.
After scrubbing it thoroughly, wipe down the griddle and see how you did. If you still have some remaining rust, you may need to use some sandpaper or a wire brush. The goal is to work the surface until you get close to bare metal. This step can be time-consuming, especially if you started with an extremely rust griddle surface. However, don’t give up. With enough work, you’ll be able to recover your griddle and get it close to its original condition.
Step 4: Season your griddle
Once you have the griddle surface clean and back to its original condition, you’ll need to season it again, just as you first purchased it. Again, take time to do it correctly and apply at least three seasoning coats during the process.
Conclusion:
Cleaning your griddle is the best way to maintain a smooth and non-stick surface. If you neglect your griddle, it will provide problems. It’s best to take care of your griddle and clean it shortly after each use. Also, give it a quick seasoning after each cook to help maintain it.
If your griddle is beyond a basic cleaning, the good thing is that you can give it a deep clean to bring it back to its former glory. Even a severely neglected griddle can be restored with a full resurfacing. The key information is to understand that an ounce of prevention is worth a pound of cure. Luckily, cleaning and maintaining your Blackstone griddle is easy, quick, and effective. So when you’re cooking up some smash burgers, you’ll be glad that you took the time to clean them properly.