I’ve been waiting to review the LevelMatePRO RV leveling solutions for some time, mainly because this could be my favorite piece of camping tech gear that I have purchased so far. The
I typically set up my travel trailer solo or with the help of my 5-year-old daughter. Her assistance usually involves reminding me that we’re at the campground and asking when she can get out and play. Before using the LevelMatePRO+, this task was time-consuming and filled with lots of trials and errors, not a good combination for an excited kid. I would typically eyeball the amount of rise I needed, set up blocks, and slowly back onto them. Then, I would recheck the level, adjust, reposition, and test again. Granted, I did get better at this process over time, but it was never quick.
Also, I never really felt like I could get the RV perfectly level consistently, which bothered me. Enter the LevelMatePRO, and this process got a whole lot easier. I will also add that pairing the

You’ll likely notice that there are two versions of the

Overview
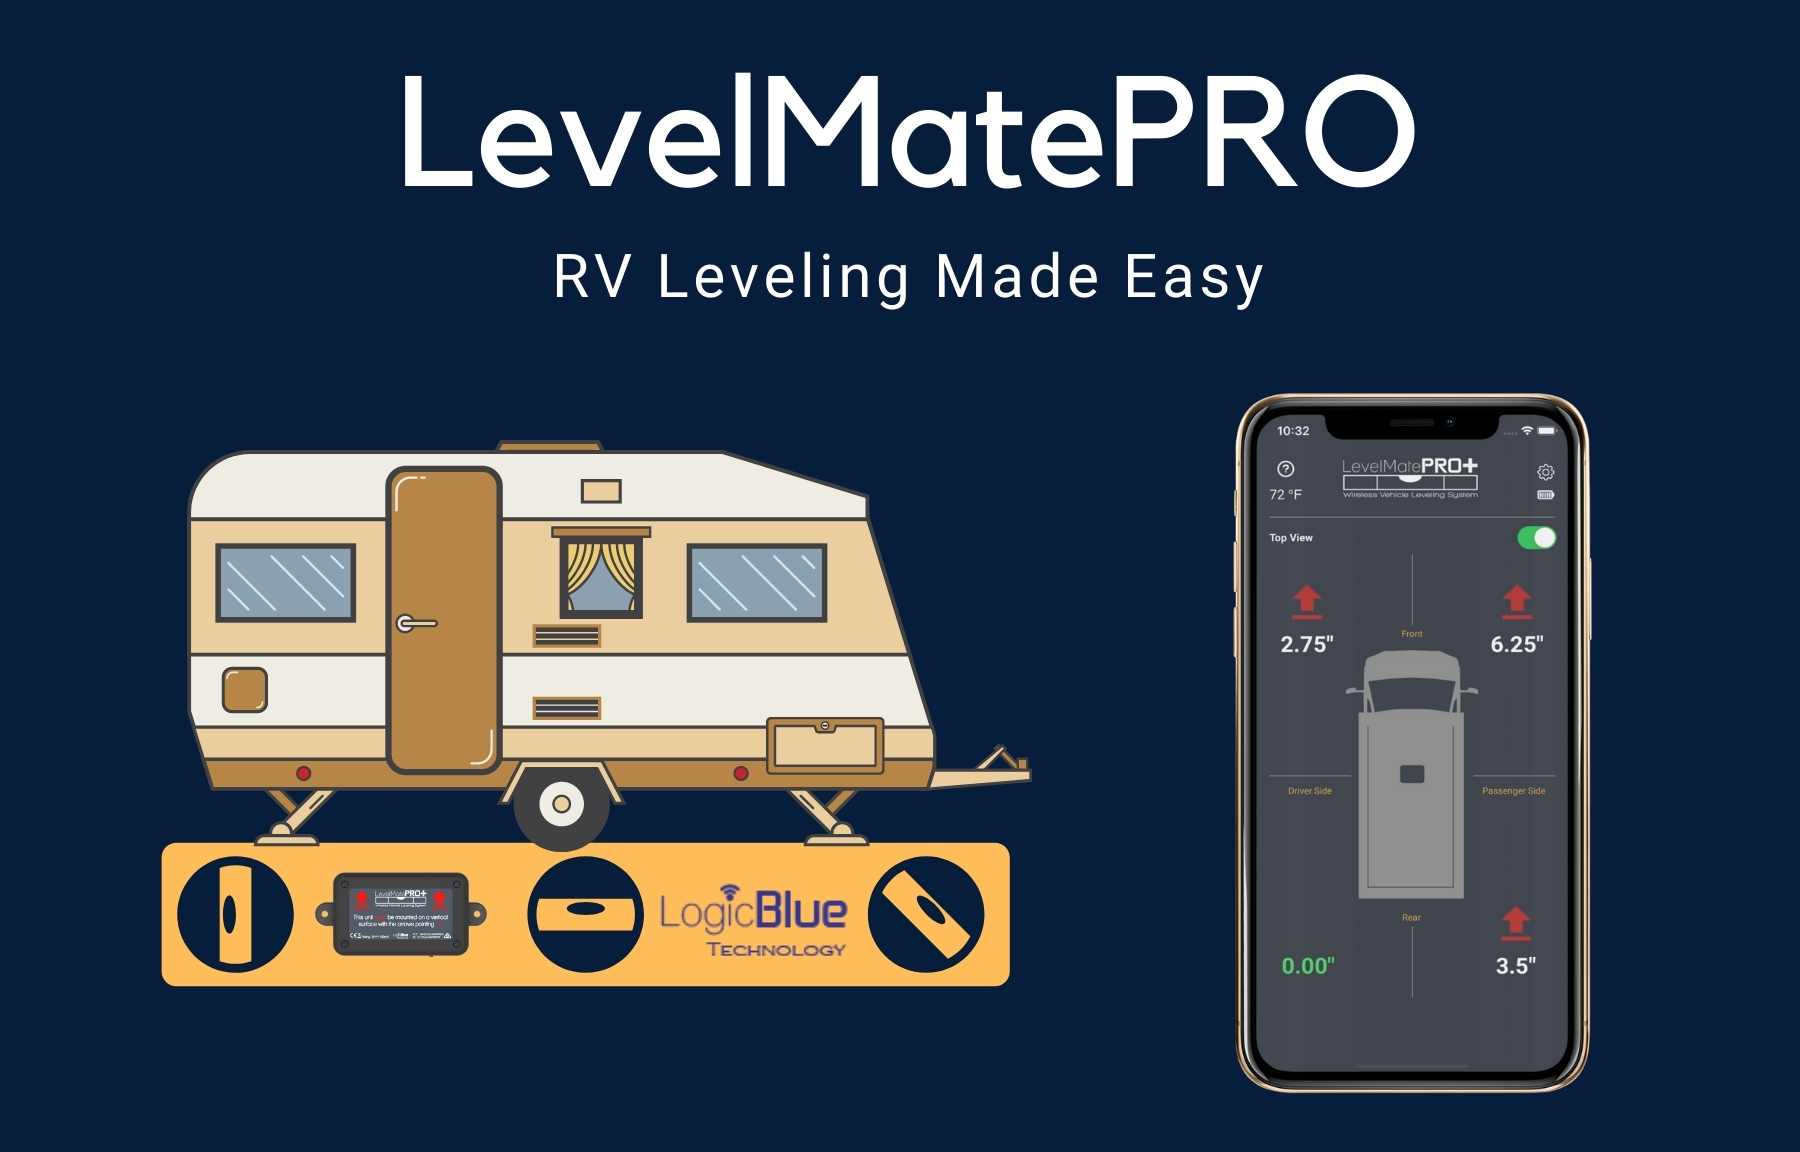
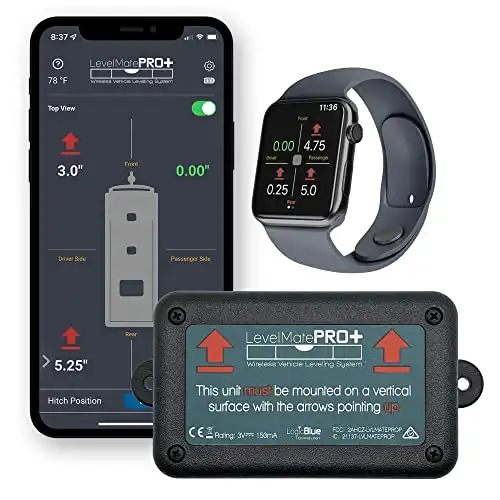
The LevelMatePRO+ is a small box that you mount inside your RV. It has an internal level sensor that pairs wirelessly with your smartphone, tablet, or Apple watch. The standard
One of my favorite tools for leveling an RV is the LogicBlue LevelMatePRO. This tool uses Bluetooth technology to connect a digital leveling device to your smartphone. It works by storing a preprogrammed level reading for your RV, which you establish once, and then use each time you need to find the perfect level.
The LevelMatePro has a free app that graphically displays how much you need to adjust your RV to get it level. When backing into a site with your tow vehicle, you can easily connect to the device on your phone and find the best spot. Next, when it comes time to adjust for level, you will see exactly how much you need to adjust your height to achieve it.
When combined with the Andersen Leveling System, the entire leveling process can be completed in a few minutes by following a few easy steps. The mobile app comprises features including hitch height memory, apple watch linking, measurement unit selections, etc. It is my favorite tool for getting proper leveling every time. It's one of the best products you can purchase to level your RV.
The LevelMatePro app has a step-by-step guide built into it that walks you through the entire process of leveling your RV for the first time. Once set, you won't need to do it again.
The LevelMatePRO+ leveling system serves two primary purposes when setting up your campsite. First, it allows you to find the most level parking position for your RV as you back/pull into your site. Next, after you locate it, you can fine-tune your level by raising the RV to the exact height using your traditional leveling blocks, or as I’ll advocate for, the Anderson Leveling System.
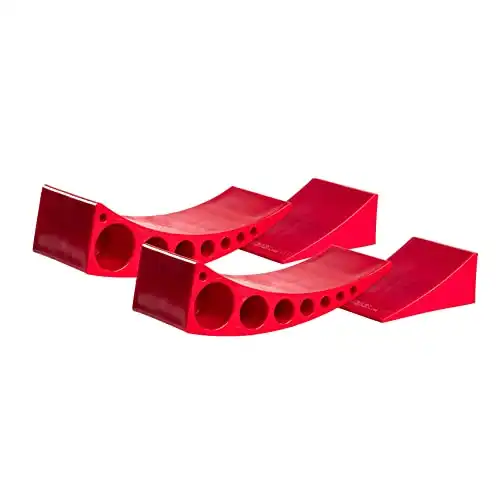
The Andersen Camper Leveler system is a simple, low-tech solution to fine-tuning your RV leveling. The system involves two components: A curved riser and a wheel chock. To use, you simply place the curved leveling pieces under the tires of the side that you need to raise up and back/drive onto it. Once level, you just insert the wheel chock behind the opposite side of the level, and you’re done.
This system makes it extremely efficient to level your RV, especially when combined with a wireless level reader like the LevelMatePro.
Pros
- Simple and low-tech design
- Sturdy and almost indestructible- solid as a rock
- One person leveling made simple
- Made in the USA
Cons
- More expensive than plastic blocks
- Limited height (only lifts up to 4”)
Installation and setup
Tools
- LevelMatePRO+
- Short level (10-12 inches preferred)
- Long level (3 feet or more preferred)
Step 1: Level the RV
The most time-consuming part of using the LevelMatePRO+ is installing it. While installation is relatively easy, you will need to spend as much time as necessary to get the RV perfectly level. This part is critical since all future leveling will rely on this step. I recommend that you try and do this somewhere as close to level as possible. A good option is to find a large parking lot in a flat area. Abandoned warehouses or malls are great for this, especially if you can access a loading dock area. However, you can do this anywhere or even at the campground. Just be aware that you’ll want to take your time with this step and get it right.
Don’t stress too much if you’re new to leveling your RV or maybe not very confident in it. It’s not too difficult. The first step is to find the most level location that you can before you unhitch (if your RV is towable). Give level preference to the side-to-side level, as this is more time-consuming to adjust. You can easily adjust the front and rear level with the trailer tongue jack.
Once you find a level parking spot, grab your levels and head into the camper (still hitched to the truck). You probably have an idea of what needs to be adjusted, but it’s important to confirm everything with the levels. There are a lot of different places that you can check for level, but my go-to ones are dead center on the floor of the trailer, stove, counters, rear bumper, and front frame. I like to use both the long and short levels. The short one is great for checking the level of things like the stove, RV freezer, countertop, etc. The large one allows you to get more accurate on the longer stretches of flat surfaces such as the floor, bumper, etc.
Once you take your level measurements, head back outside and begin building your side-to-side blocks or using another leveling system (Anderson Levels) to raise the side of the RV. Slowly back onto the blocks or ramps, and then head back to the RV to check how you did. Take more measurements and adjust if needed. Remember to get your trailer as close to level as possible for this step.
Once you are satisfied with your side-to-side level, chock your wheels and disconnect from the truck from the RV if necessary. Then, repeat the same leveling process for front to back. However, this is much quicker now that you can use the tongue jack. Once you’re happy with the RV level, you’re done. Sometimes it’s easy to say “good enough” when setting your level. However, if you do that now when setting up the LevelMatePRO+, all future levels will just be “good enough.” If you’re in a motorhome, your process will be a little different, but just use whatever method you traditionally use to
When leveling for this project, be extra thorough and check many different areas. I also like to take an additional step and check that cabinets and refrigerator doors open and close smoothly. I’ll even do a simple roll test with a ball or round piece of pipe to see that it stays put. You can also check your kitchen sink to ensure water doesn’t puddle up in one corner- that indicates your level is off. This is the last time that I’ll annoy you with this message: Take your time and try to get it as close to perfect as possible- you’ll thank me later!
Step 2: Connecting to the LevelMatePRO +
After leveling your trailer, the hard part is over. The rest of the installation is relatively straightforward. The next thing that you’ll want to do is get ready to mount the LevelMaterPRO in your RV. You can mount this on virtually any horizontal wall or surface in the RV. However, I recommend installing it towards the front of the RV to improve the wireless connection, especially if you plan to connect to it while inside your vehicle.
However, before you mount it, you will want to pair it with your phone and ensure it’s working correctly. By doing this first, you can also test mounting locations to ensure that you have a strong connection while inside your vehicle. You can do this step before leveling, but I’ll describe it here to keep everything simple to follow.
To start, you’ll want to remove the four screws on the lid and set them aside. Next, insert the included battery from the packaging and install the plus (+) sign-up. Once inserted, replace the lid and reinstall the screws. If you want to use the RVs 12V system to power it, the
Next, download the app. Go to the appropriate app store and download the app for your phone. In either the Google Play Store or Apple App Store, search for “levelMatePRO” to locate the app. Download the app on the device(s) you plan to use with the LevelMatePRO+.
To pair the app to your LevelMatePro+, slide the on/off switch to the “on” position. Next, you should hear two beeps. Try it again, or check your battery if you don’t hear the beeps. You’ll need to repeat this step for every device you want to use. After you hear the beeps, start the
The next step is to enter some details about your RV. The
- RV Type
- Signal strength test
- Measurement units
- RV Length/Width
- Mounting location/user preferences
- Set Level

After the second step, when you find a good location for installing it, you’ll want to mount it in its permanent location. For me, this location was inside the front closet against the outside wall. You can mount it on virtually any vertical surface but do so in a sturdy place, out of the way, somewhere where it won’t shift, and where it provides a good signal.
Once you go through all of the steps, the last one is to set your level. Assuming you already leveled your RV, you’re good to go. However, this should be the final step in the setup process. After you click set level, you can tap on the ‘Finish Setup’ button. The app will now provide you with a walkthrough of its various features.
Step 3: Using the LevelMatePRO +
Now that you have the LeveMatePRO installed, you’re ready to start using it. Here’s how you do it.
- First, position your RV to the location where you would like to begin leveling. This will most likely be at your campsite. It’s always helpful to try and start with the most level position that you can, which will reduce the adjustments you’ll need to make to raise the RV.
- Connect to the LevelMatePRO+. Make sure that the
LevelMatePRO + is switched to the ‘on’ position. Just as with the setup, you’ll hear two beeps letting you know that it’s on. Once you hear them, open the app, and the LevelMatePRO+ will connect automatically. A cool feature of the LevelMatePRO is the sleep feature. This will put the unit to sleep when parked after it stops moving, saving your battery. When you start moving again, it will wake up. However, if it’s not connecting, you can just toggle the on/off switch when connecting via the app. - Once connected, the app will move to the leveling screen. The leveling screen will be based on the type of RV you selected during the setup process. The leveling screen will display a red arrow pointing upwards, indicating which side of the RV/wheel needs to come up to achieve a level position from side to side. Using your preferred leveling technique, raise the side of the RV to the indicated measurements on the app. This is where the Anderson Levelers prove their weight in gold. Rather than building blocks to raise the RV, you can simply back/pull onto the Anderson Levelers and quickly and easily reach the perfect adjustment. Once you have achieved a level position, the display measurements will read 0.00 inches (or other chosen measurements). If you’re in a drivable RV, you’ll follow the same steps but adjust to level it just as you typically would (with or without leveling jacks). The process is essentially the same, and you’ll visually see how much rise you need to achieve level for each tire.
- If leveling a trailer, you’ll need to adjust the front to back level of the RV. Disconnect from your tow vehicle and release the hitch. A super convenient feature of the LevelMatePRO+ is its ability to save the tow hitch position of your towing your RV. You can select this on the app. This step allows you to record your hitch height for easy connection when hitching back up. Once set, you’ll now see how much the front of the camper needs to come up or down. You’ll make this adjustment with the tongue jack, just as you normally would. Adjust the tongue jack until your level reads 0.00 inches (or another chosen measurement).
- You’re done! Your RV should be perfectly level.
The app is straightforward to use, and it will all make sense when using it. There are very good instructions provided that will guide through everything that I discussed above in much more detail. Also, please remember to follow all safety steps when leveling your vehicle and disconnecting a tow vehicle. This safety check includes ensuring that you properly chock your RV tires, just as you normally would.
Conclusion:
After using the LevelMatePRO+, you’ll soon wonder how you managed before owning it. It makes the setup process much easier, especially if you combine it with the Anderson Levelers. Leveling an RV is not rocket science, but it can be time-consuming and frustrating. By speeding up this process and having a level RV, you can spend more time enjoying your vacation and less time fiddling with manual levels.
Below are some of the pros and cons of the LevelMatePro+
Pros
- Once installed, it’s a huge time saver.
- You only need to set it up once.
- Works with all RVs.
- It’s very accurate.
- It’s cool and makes a great discussion topic around the campground (I tell everyone about it).
- Works with most smartphones.
- Usable with Apple Watch.
- Doesn’t require wifi or internet to use (just the Bluetooth from your device).
- Made in the USA (always a plus).
- Tech support is outstanding.
Cons
- It’s more expensive than a cheap bubble level.
- You need to remove the screws to change the battery.
- If your battery dies, you’ll need to have a spare CR2450 battery. However, you can plug the
LevelMatePRO + into a microusb port. The standardLevelMatePRO uses a CR2032 battery. - It’s not for everyone- some people just don’t want tech gadgets when camping.

Thank you. Great directions