
Did you ever leave your home without your phone and feel a little lost throughout the day? Well, that is exactly how I would feel if I went camping without my Andersen Levelers (not Anderson levelers). The Andersen Camper Leveling System is one of my “must-have” gear picks for RV travelers. Why do I love them so much? It’s because they work very well and are a huge time saver.
I typically set up my travel trailer at the campsite by myself. However, leveling the RV was always a task that I loathed. Using leveling blocks, I could never get the RV level, and it simply took a long time for mediocre results. One of the challenges with leveling blocks is that they adjust in set increments of the thickness of the blocks. The benefit of this innovative camper leveler is that you can make limitless adjustments up to its maximum range.
What is the Andersen Leveling System?
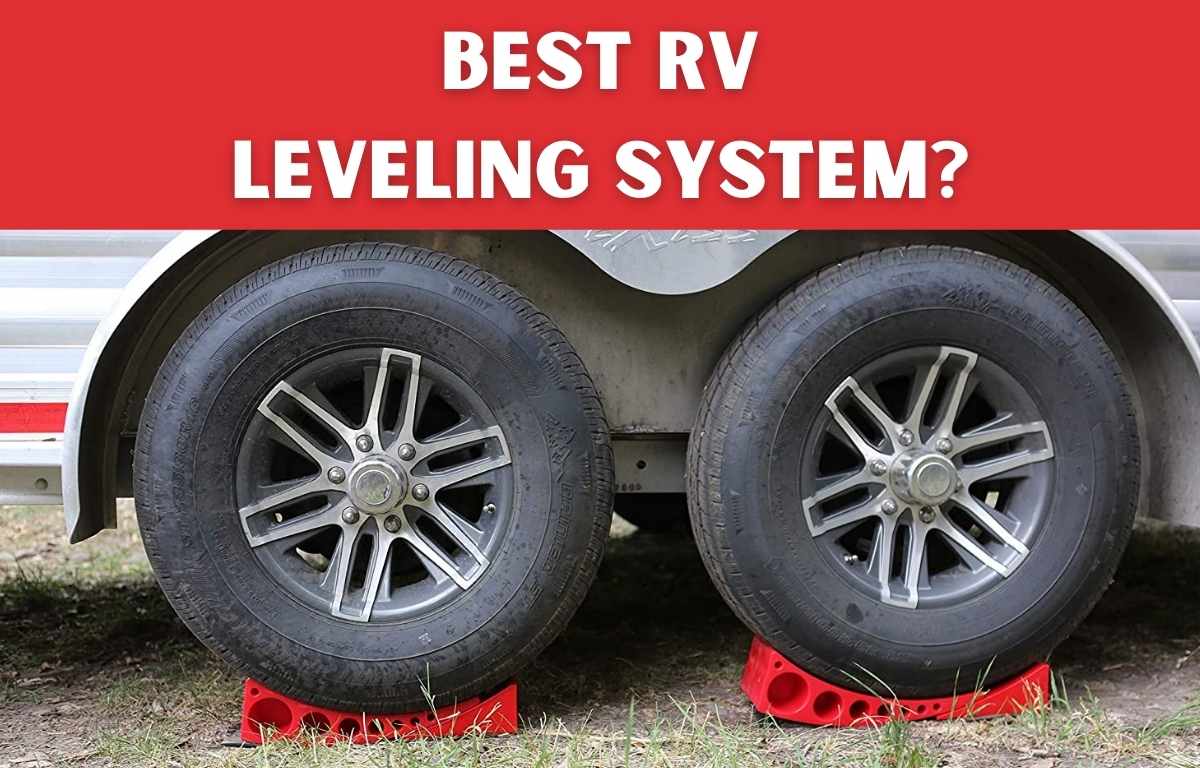
The Andersen Leveling System is a ridiculously simple leveling system that utilizes a curved leveler that you drive/backup on to raise your RV tire. It’s like having a personal leveling ramp to increase your height. The system comes with two curved levelers and two-wheel chocks, which work together to raise and secure your tires. This system is made by the same company that makes the well-known Andersen Hitches.
Unlike traditional leveling blocks, the Andersen Levelers will allow you to raise the RV to any height you need, up to the maximum height of 4 inches, which is sufficient for the vast majority of campsites. Rarely do I not get enough height with the Andersen ramps. We’ll cover the details of the Andersen Camper Leveler system, but first, let’s look at some basic principles regarding leveling your RV.
Why is it Important to have a Level RV?
Leveling an RV is an essential part of setting up your campsite, and its importance is often underscored by a variety of factors. Firstly, it is crucial for your comfort. An unlevel RV can make simple tasks, such as cooking, sleeping, and even walking through the RV, uncomfortable or difficult. When an RV is on an incline, objects can roll off tables, liquids may spill more easily, and getting a good night’s sleep can be a challenge if you’re always sliding to one side of the bed or sleeping on an incline. Additionally, doors may swing open or shut, and you could even find yourself feeling a bit disoriented or off-balance. While an RV may not look too unlevel, it’s easy to tell when you’re living in one.
Secondly, leveling your RV has significant implications for the functioning of your appliances. The most prominent example is the RV refrigerator, which relies on gravity to circulate the refrigerant. If the RV is not level, the refrigerant may not flow properly, which can lead to poor cooling performance or even damage to the refrigerator. Similarly, other appliances and systems, like the plumbing, could potentially be affected by the RV not being level. For instance, the drains might not work correctly if the RV is tilted, and the effectiveness of the heating and cooling systems might be compromised. Water can pool in the corner or side of a sink and create problems.
Lastly, leveling an RV contributes to the structural integrity of the vehicle itself. When an RV isn’t level, it can put unnecessary stress on its structure. Over time, this can lead to wear and tear on the frame, potentially resulting in long-term damage. Furthermore, leveling an RV also helps to stabilize it, reducing the amount of movement you feel inside when people are moving around. This not only increases comfort but also minimizes the risk of accidents caused by the RV rocking or even tipping over. It’s important to level the RV as soon as you get to camp because once it’s disconnected from the truck (if it’s towable), it’s near impossible to level it without reconnecting your tow vehicle.
How do you level your RV ?
Leveling your RV is crucial for comfort during camping trips and to ensure the correct operation of appliances like refrigerators. It’s a pretty simple process, and after a few trips, you’ll find your favorite methods and be able to do it faster.:
- Find a level spot: When you first pull into your campsite, try to find the flattest spot available. Use your natural judgment to see what area looks most level.
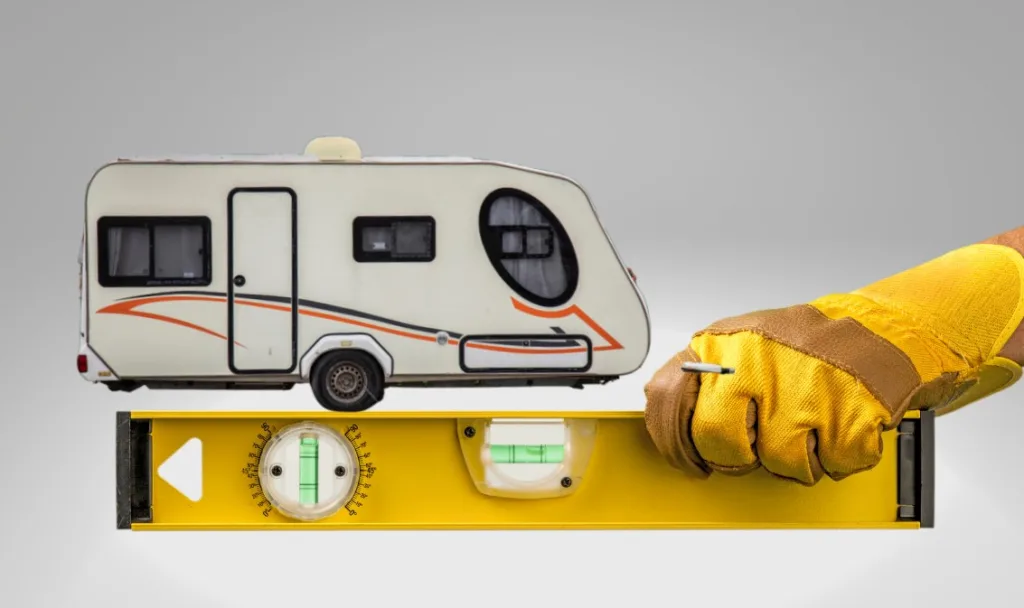
- Use a bubble level: Place a bubble level on a flat surface inside the RV (like the floor or a counter). This will help you determine how
level your RV is and what adjustments you need to make. There are also smartphone apps that can serve as a level. - Adjust the RV’s position: If the RV isn’t level, adjust its position in the spot. You may need to move it forward, backward, or to the side. Check the level again after moving. Once you have the best spot, engage the tow vehicle’s parking brake and position your leveling devices.
- Use leveling blocks or jacks: If adjusting the position isn’t enough, you’ll need to use leveling blocks or the leveling jacks (if your RV is equipped with them). For leveling blocks, place them in front of the tires that need to be raised, then drive onto the blocks. For a single axle trailer, you will need one set of blocks. A tandem axle trailer will require two sets. In general, you’ll want to raise the low side or end of the RV until it’s level. It’s usually best to level from side-to-side first, then front to back. If you’re using blocks, you may need to stack them like a pyramid to provide enough lift.
- Check the level again: After making adjustments, check the bubble level again to see if the RV is now level. Repeat the previous step if necessary.
- Secure the RV: Once your RV is level, make sure to chock the wheels to prevent it from moving. If you’re using leveling jacks, they should be firmly in contact with the ground. You may want to lower the stabilizing jacks (if your RV has them) to reduce movement when you’re inside the RV. At this time, you’ll also want to lower the stabilizer jacks. Remember, stabilizer jacks or not for raising or lowing your RV, so do not rely on them to adjust its height.
Traditional tools to level your RV
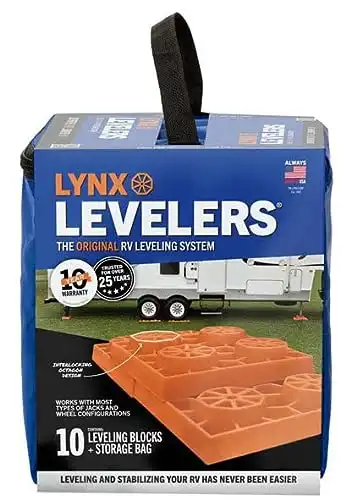
Leveling Blocks
RV leveling blocks are essentially plastic or rubberized blocks or pads that are designed to be placed under an RV’s wheels or jacks to help level the RV. These blocks are stackable, allowing you to adjust their height to meet your leveling needs.
They are typically durable, resistant to the elements, and designed to support a lot of weight, making them ideal for use with heavy vehicles like RVs. Their purpose is to raise the RV’s low side to match the higher side, ensuring the RV sits level.
You use them by first determining which side of your RV is lower and then placing and stacking the blocks in front of or behind the wheels on that side. Once the blocks are in place, you then drive or reverse your RV onto them. After each adjustment, you’d check the level of your RV and add or remove blocks as necessary until your RV is perfectly level. I find it’s easiest to place them in front of the wheel and drive onto them rather than back onto them.
Most of these plastic blocks are designed to interlock with each other, similar to Lego blocks, which can create a secure and stable platform for your RV. They come in various sizes, so it’s important to choose one that matches the size of your RV’s tires and the weight of your RV.
Aside from leveling your RV, these blocks can also be used under stabilizing jacks or under your RV steps for a more secure and firm base. It’s also advisable to use leveling blocks even when parked on paved surfaces to prevent your RV’s tires from resting on hot asphalt for extended periods, which can cause damage to the tires.

Wood Blocks
Wooden blocks are an inexpensive solution for leveling the front of your trailer. They are placed directly under the tongue jack. You will not need these for a 5th wheel. While some people use wood blocks for sid-to-side leveling, they’re not recommended because they can easily shift when driving onto them and don’t provide the same security as an interlocking level block system.
Why are Andersen Camper Levelers one of the Best Ways to Level your RV ?
First and foremost, Andersen Levelers are fast and easy to use. They make the job of leveling your RV a breeze when compared to other options. They are also very secure and will provide peace of mind that your RV won’t shift at the campground or result in an RV mishap from DIY options like wooden blocks.
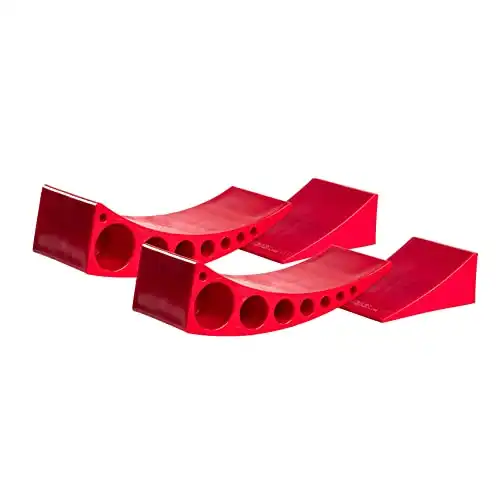
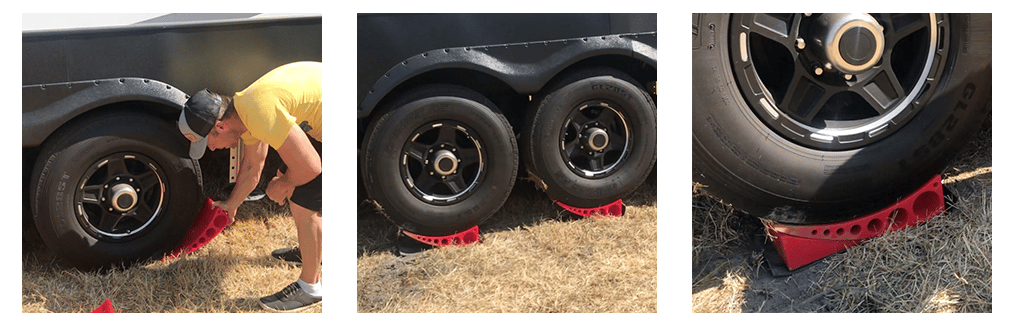
The Andersen Camper Leveler system is a simple, low-tech solution to fine-tuning your RV leveling. The system involves two components: A curved riser and a wheel chock. To use, you simply place the curved leveling pieces under the tires of the side that you need to raise up and back/drive onto it. Once level, you just insert the wheel chock behind the opposite side of the level, and you’re done.
This system makes it extremely efficient to level your RV, especially when combined with a wireless level reader like the LevelMatePro.
Pros
- Simple and low-tech design
- Sturdy and almost indestructible- solid as a rock
- One person leveling made simple
- Made in the USA
Cons
- More expensive than plastic blocks
- Limited height (only lifts up to 4”)
How does the Andersen Leveling System work?
Below are some simple steps to use the Andersen Leveling System.
Step 1: Inspect the campsite
Once you get to your site, like any leveling system, get out of the tow vehicle and look at the site. You’ll want to figure out how far back you need to be to make your connections. Next, look at the site and find the levelest area for your tires. Don’t worry so much about the front-to-back level. Focus more on the side-to-side level.
Next, back up your RV to the area you just identified, stopping about a foot short of where you want to be. Then, you’ll be backing up a little further onto the Andersen Levels to get to your final position.
Step 2: Place the Andersen Levelers
To use the Andersen Leveling System, you place the two Anderson Camper levelers behind (or in front of) the tires of the side of the RV that you want to raise. A standard set is enough for a trailer with dual wheels. Once set, you slowly back up (or pull forward if installed in front). The tires will roll along the leveler’s smooth, curved base as you do this. As you move across the curved leveler, your RV will start to rise. The thicker the section of the leveler you’re on, the more rise you’ll get out of it. If you go too far and it’s too high, simply reverse your direction and inch back down. Once you get to the desired height, put your tow vehicle in park, check your level, and install the wheel chocks.
Step 3: Install Wheel Chocks
To install the included wedge chock, you slide each one underneath the thin side of the leveler. This step will create a boat-shaped cradle for the tire to rest on. I like the push it in tightly to create a solid base for the tire. Once it’s secured, install your other (non-Anderson) wheel chocks (as you usually would) on the opposite side of the trailer or RV. That’s all there is to it.
I also like to use this time to install the X-Chocks between the tires. This accessory is a separate product that helps to limit the trailer’s bounciness. Check them out here.
Construction of the Andersen Levelers
Andersen makes the levelers from a very hard type of plastic. If I had to compare it to something, I would say it has a similar feel to the plastic used in park benches or picnic tables. The heavy duty construction means that they’ll last for years of use. Andersen even provides a lifetime warranty on them, the ultimate sign of a company standing behind their product.
They’re hard as a rock and appear to be bomb-proof. They’re NOT made of the same lightweight material used in an RV leveling block. I expect them to outlive my camper. They’re also made in the USA, which is a plus.
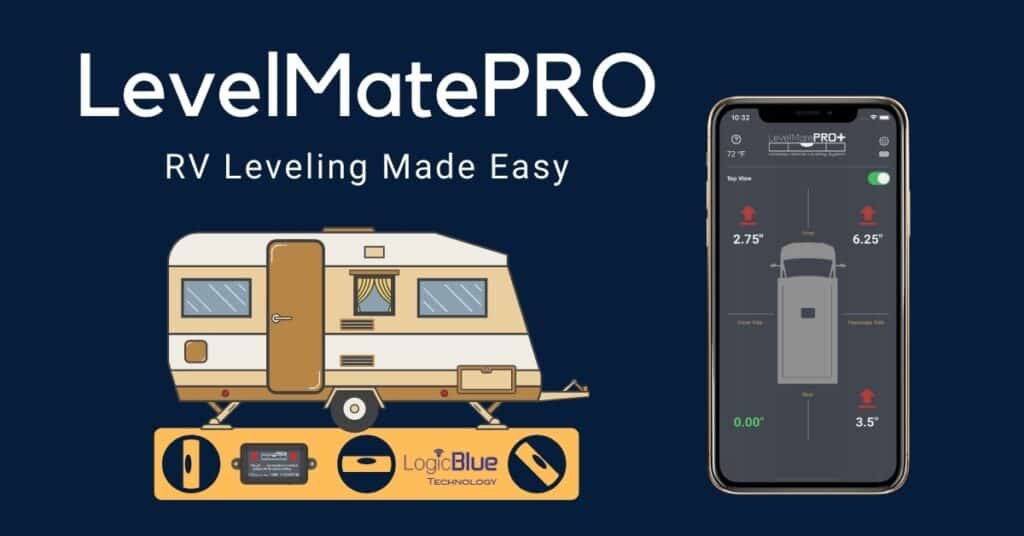
Combined with the LevelMate Pro
Some things in life seem to go together, like bacon and eggs or peanut butter and jelly. In the camping industry, two are the Andersen Levelers and the LevelMate Pro. While the Andersen system works fine with any level, even a simple bubble level, nothing works better than the LevelMate Pro. The LevelMatePRO+ leveling system serves two primary purposes when setting up your campsite. First, it allows you to find your RV’s most level parking position as you back/pull into your site. Next, after locating it, you can fine-tune your level by raising the RV to the exact height. When used with the Andersen Levelers, you can quickly and easily
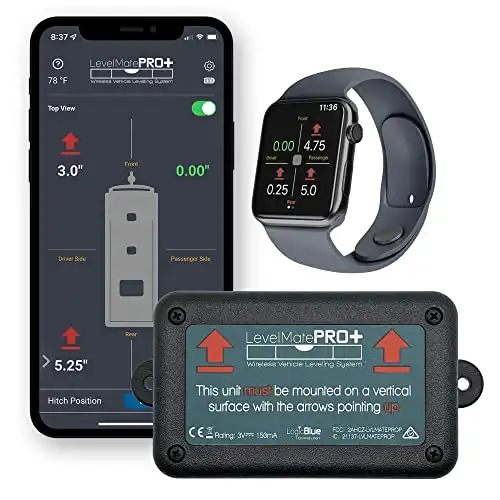
One of my favorite tools for leveling an RV is the LogicBlue LevelMatePRO. This tool uses Bluetooth technology to connect a digital leveling device to your smartphone. It works by storing a preprogrammed level reading for your RV, which you establish once, and then use each time you need to find the perfect level.
The LevelMatePro has a free app that graphically displays how much you need to adjust your RV to get it level. When backing into a site with your tow vehicle, you can easily connect to the device on your phone and find the best spot. Next, when it comes time to adjust for level, you will see exactly how much you need to adjust your height to achieve it.
When combined with the Andersen Leveling System, the entire leveling process can be completed in a few minutes by following a few easy steps. The mobile app comprises features including hitch height memory, apple watch linking, measurement unit selections, etc. It is my favorite tool for getting proper leveling every time. It's one of the best products you can purchase to level your RV.
The LevelMatePro app has a step-by-step guide built into it that walks you through the entire process of leveling your RV for the first time. Once set, you won't need to do it again.
Since the Anderson levelers allow for finite adjustments when backing up your RV, having the ability to monitor your RV level when sitting in the tow vehicle makes it unbelievably valuable. For example, if you need to raise your RV up a half inch, simply creep onto the Andersen levelers while watching the screen on your phone. You keep moving until you have the right height. It’s the ultimate in ease of use, allowing you to get your trailer level on the first try every single time.
Limitations of the Andersen Levelers
If there is one downside to the Andersen Leveling System, it’s the limit on the maximum height that it can raise the RV. The levelers can raise the RV from .5 inches up to 4 inches. However, I rarely run into a situation where this isn’t enough for me. At most sites, if you do a little “looking around,” you can usually find a reasonably level spot to start with, and the 4” will be enough. Since owning them, there were only a handful of times when they didn’t provide the necessary lift, and it was only by an inch or two.
I’ve also encountered a few people who said the space between the two wheels wasn’t wide enough. I believe this is a rare exception, but Andersen does address this and provides instructions for cutting the levelers shorter to fit this situation.
Finally, if you’re setting up on the soft ground since they don’t have a lot of rise, they can sink into the ground and make the process more difficult. They work best on hardened surfaces. You can purchase the kit with rubber pads that helps prevent this situation or to use it when setting up on a paved surface.
Cost of the Andersen Levelers
The Andersen Leveling System is more expensive than leveling blocks, but in my opinion, a better investment. You’ll need a two-kit system for one camper for about $100. Of course, you can also splurge and get an upgraded kit with a carrying bag and jack blocks/pads. I haven’t used any other products because my wooden blocks work fine. However, if you purchase leveling blocks, you will likely need a couple of bundles and spend $50-$80 on them. For a little more money, you’ll get a far superior product.
Learn More
I honestly have only positive things to say about the Anderson Leveling System. They work well and are easy to use for one person. Other RV owners agree, which is evident when you read the reviews. I highly recommend pairing them with my favorite camper set-up tool, the LevelMate Pro. They’re super easy to use, and after doing it for the first time, you’ll be able to
The Andersen Camper Leveler system is a simple, low-tech solution to fine-tuning your RV leveling. The system involves two components: A curved riser and a wheel chock. To use, you simply place the curved leveling pieces under the tires of the side that you need to raise up and back/drive onto it. Once level, you just insert the wheel chock behind the opposite side of the level, and you’re done.
This system makes it extremely efficient to level your RV, especially when combined with a wireless level reader like the LevelMatePro.
Pros
- Simple and low-tech design
- Sturdy and almost indestructible- solid as a rock
- One person leveling made simple
- Made in the USA
Cons
- More expensive than plastic blocks
- Limited height (only lifts up to 4”)
Since writing this review, there are similar items on the market, such as Camco Levelers, the Beech Lane camper leveler system, and several no-name copy-cats available on Amazon. I imagine they work similarly to the Andersen ramp levelers, but you may not get the same quality that I’ve grown to appreciate.
You may also be interested in learning more about stabilizing your RV. Here’s a great article that walks you through the best steps for getting your RV stable and bounce-free:

I bought leveling blocks for my husband but they were actually for me so I didn’t have to keep stacking the other leveling blocks! They are EXTREMELY easy to use and we had no problem with them flying in the grass when reversing. They are very sturdy and a great product in every way. We have a 35ft trailer with slides and they hold the weight with no problem.
Thanks for sharing your experience. Wishing you many more years of trouble-free leveling.
Glad you agree! I love mine.
Thank you for recommend these product. I bought these Camco leveling blocks, expecting that they offer excellent features.