
Getting an RV ready for winter living is less of a science and more of an art. While some RVs are built for everyday living in the harshest environments, most are not. However, this doesn’t mean that they can’t be, or at least to some degree, outfitted to give you a full four-season camping experience. Below is my story. It’s a work in progress, but l hope to inform you of my steps to winterize my RV for everyday use. In addition, I will document my success, failures, and lessons that I learn along the way. I invite all of you to follow along.
Current Progress (as of December 13, 2021)
| Project | Complete/to-do | Completion Date |
| Skirt RV | Complete | November 27, 2021 |
| Wrap windows | Complete | December 9, 2021 |
| Insulate Windows | Complete | December 11, 2021 |
| Seal up exterior gaps | Complete | December 11, 2021 |
| Insulate storage doors | To-do | December 20, 2021 |
| Add under-camper heat lamp | Complete | December 20, 2021 |
My RV: 2019 Keystone Outback 29UBH
I have a 30-foot Keystone Outback travel trailer that I’ll be living in throughout the winter. The RV doesn’t have a full 4-season option, but it does have a one-piece polypropylene heated enclosed underbelly. This setup is a good start. There is one slideout on the RV with four large windows. It’s excellent for sunlight and creating that open feel, but it is challenging for cold winter weather.
I have the trailer connected to a 30amp outlet, which can run at least one space heater. I use water by filling up the freshwater tank vs. a permanent city water connection. I dump wastewater via a portable storage tank into a residential septic system.
This winter, the main goal is to keep all water lines unfrozen and the cabin’s interior comfortable. Heat is primarily supplied via the RV furnace and supplemented with an electric space heater. The furnace is critical for keeping the underbelly warm enough to prevent freezing.

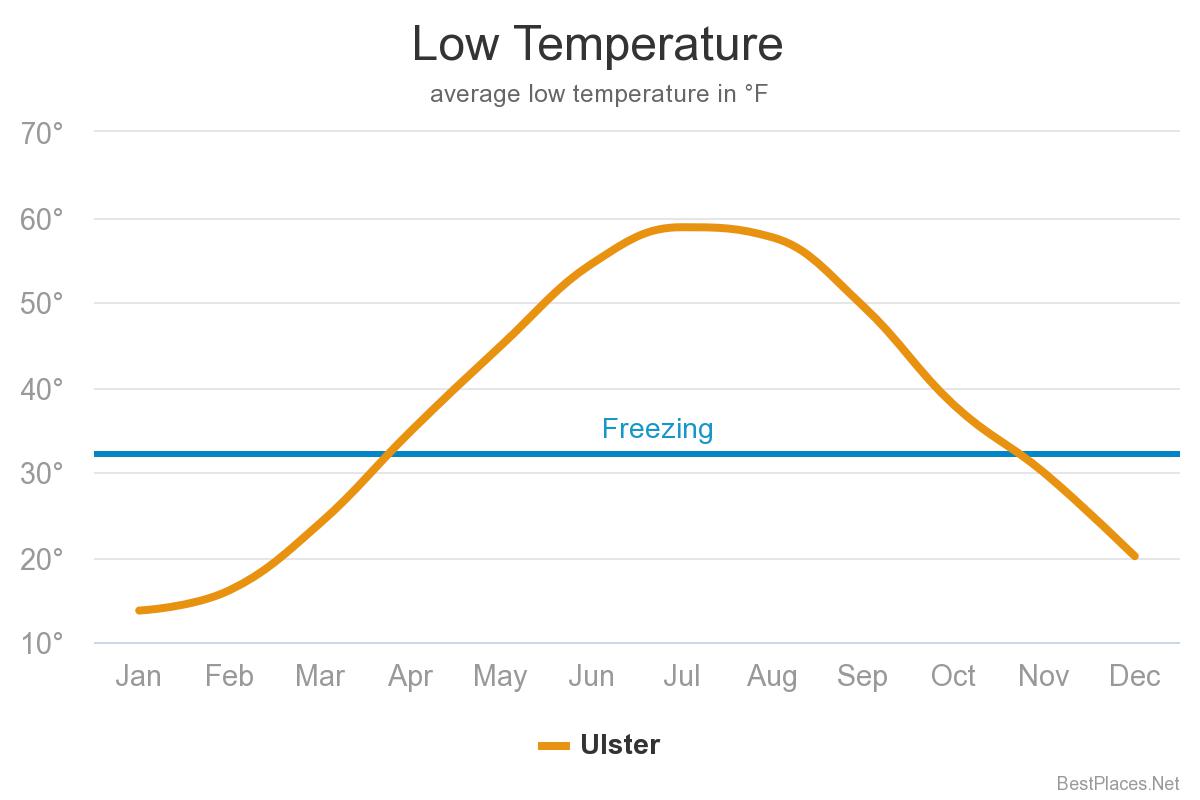
Upstate New York Weather
New York winters can be cold, and this year is proving this true. From November through mid-March, the average low temperature is below freezing. Mid-December through early March, most days will be at or below freezing for a large percentage of the day. Currently, November has proven to be cold. Recent days are below freezing from 4:00 PM through 10:00 AM, only climbing slightly above freezing into the high 30s or low 40s. This reprieve from freezing temperatures will only decrease as we move further into the winter months.
Monitoring the temperatures
While I’m living in the RV full time over the winter, I am not here all of the time. Luckily, this is usually during the day when I’m working and when temperatures generally are not as harsh. However, I want to know how my RV handles the cold and freezing temperatures, so I can prepare appropriately.
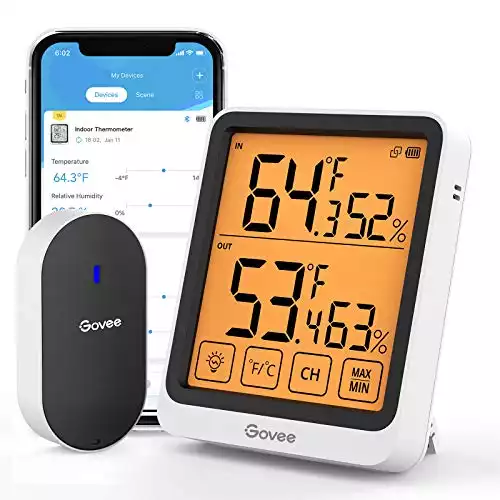
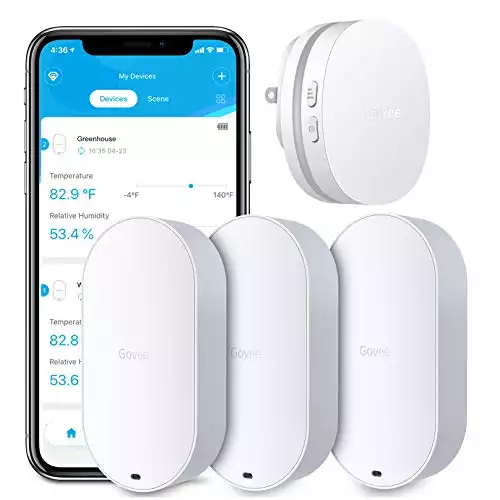
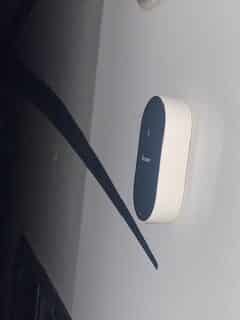
To provide me with this information, I opted to install remote thermometers throughout the RV. I decided to go with the Govee brand of thermometers. They are well-reviewed, have good ratings, and are affordable. I purchased two different packages, which I can monitor wirelessly with a single app. The first product is a three-pack of indoor thermometers. The second is an outdoor thermometer with an indoor base.
I purchased these two items so I could monitor both indoor and outside temperatures. However, a newer product is available that includes three outdoor thermometers, which may be a better deal for your setup.
|
Outdoor
|
Indoor
|
|
N/A
|
N/A
|
Next, what to monitor. I decided that I wanted to observe five different locations. They are as follows:
- Main living area in RV
- Outside temperature
- Underneath the camper (inside skirting)
- Inside the underbelly
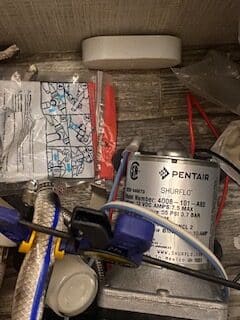
- Inside the pump storage box
These five locations should give me all of the data that I need. In addition, I can monitor the three wifi units remotely on my smartphone, so when I’m at work or away, I can see real-time information on the temperatures.
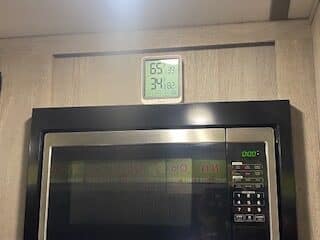
The other two (inside living area and outside temperature) are accessible via Bluetooth, but they do log all of the data and make it available on the phone app. I will now know when the critical components reach a dangerous temperature. I will also learn more about how often I need to run the furnace to keep the temperatures above freezing.
Heating options
Propane Furnace: The propane furnace will be my primary source of heat. It evenly distributes the heat throughout the camper and is required for heating the underbelly. I have two 100lb propane tanks that will run the furnace. I hope to get at least a week out of each tank, but hopefully more if the rest of the retrofits improves efficiency.
Space heater: I have a 1,500-watt infrared
Heated mattress pad: This is probably the most efficient option for staying comfortable during the night. I can lower the thermostat to 60 degrees F and stay nice and warm at night. I do want to monitor the underbelly temperature, but for most nights, this should be plenty.
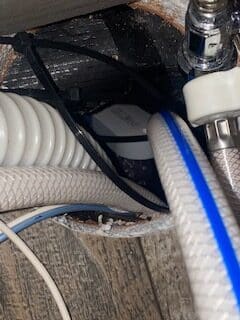
Heating pad: One of the most vulnerable areas of the camper is the water pump enclosure. I will be insulating this area, but I have a small heating pad that I can plug in to raise the temperature to prevent it from getting too cold. In the future, I may connect this to a Wi-Fi plug and automate it to turn on when the temperature drops. Currently, I’m doing this manually.
Heat Lamp: I am considering installing an optional heat lamp underneath the camper (inside the skirting) below the water tank area. I want to have an option for frigid nights when temperatures are in single digits for extended periods. I will likely add this later in December as a backup option for these more extreme conditions.
Winterization Projects
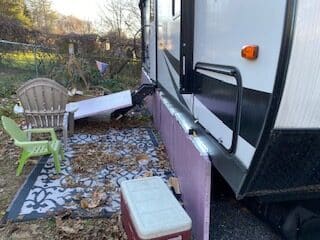
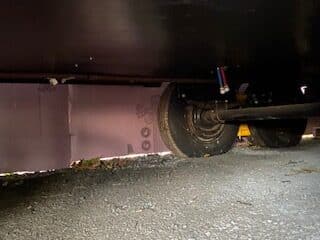
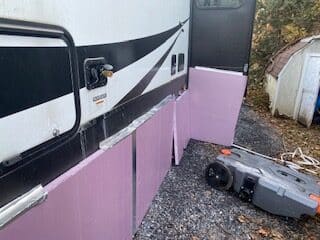
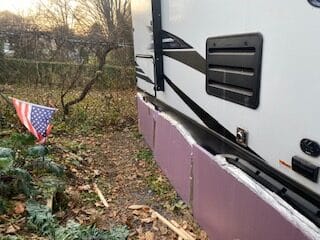
RV Skirting
I decided to install RV skirting using foam board. I planned to do this earlier in the fall, but availability was a challenge in my area. Every time I tried to purchase it, there wasn’t enough stock to complete the entire project. Finally, in mid-November, I did manage to buy it for the project.
I considered all options for skirting; however, I did want to go the DIY route. I looked at aftermarket kits, but they were just too expensive for my needs and would have cost well over $1,000 for the least costly solution. I also considered installing my own vinyl, but this was more expensive and something that I didn’t feel would be as efficient as other options. Finally, I investigated using hay bales for the low end of the price scale, but this would have been more difficult to get a good seal, and I was worried about critters using it for a warm oasis over the winter.
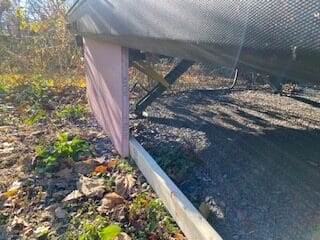
I decided on a rigid foam board for both ease of installation, cost, and insulating value. I looked at various thicknesses. I read multiple opinions online regarding the thickness of the foam, with many people saying that thicker foam won’t add too much benefit to the project. I decided on a 1.5-inch pink insulation board to provide some insulating value but, more importantly, rigidity. The foam board is easy to cut to the dimensions I need and would provide a solid barrier to keep out wind and hopefully prevent heat loss when it warms up under the RV.
Installation
| Materials | Quantity | Cost |
| FOAMULAR 1.5 in. x 4 ft. x 8 ft. Rigid Foam Board Insulation | 7 | $33/board |
| Nashua Aluminum Extreme Weather Foil Tape | 1 roll 3”x 50 yards | $14 |
| 24″ Wooden stakes | 24 | $11 |
| TOTAL COST | $256 |
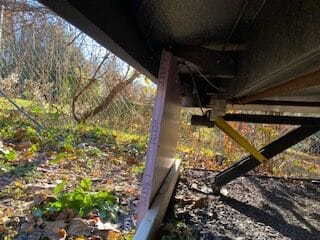
My original plan was to install the foam board on the backside of the RV wall. I decided to increase its rigidity by sandwiching it between a 2×4 and a wood stake in the front. After attempting this technique a few times and struggling to get a good seal, I shifted gears. The underside lip of the trailer’s metal panel made taping difficult. Instead, I opted for taping it to the outside of the RV. This setup alone (board and tape) seemed to provide more than enough rigidity for my needs. I did decide to drive in some wooden stakes on the outside of the foam board to add even more strength if it gets windy. However, I do think that this is overkill, and the tape alone will be sufficient.
The way my RV is parked, I had high walls towards the front of the RV, so I needed to cut the foam board on the short end and primarily use four-foot sections to create the skirting. If you can set up the RV with less of a lift, you may be able to use longer eight-foot runs of 24 inches rather than do what I had to do. However, the shorter four-foot sections worked well with my RV’s various moldings, obstacles, and characteristics. In addition, they allowed me to limit the number of boards I needed for the job and reduce any waste.


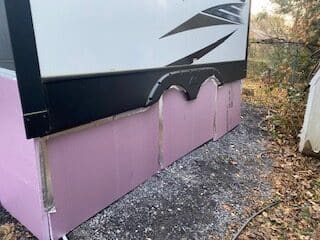
Cutting the board was easy once I got the hang of it. I initially used a drywall hand saw, but it was messy. What I found out was the most efficient and cleanest method was to use a utility knife to score the foam and then just break it. If you cut it straight and deep enough, this works perfectly. I didn’t have any mistake breaks. However, the saw is still helpful when cutting out specific shapes around obstacles such as lights, switches, steps, fenders, etc.
I cut each piece about 2″ above the exterior wall. Then, I taped each piece horizontally along the wall and tried to have about an inch of tape on the RV. The aluminum tape is straightforward to work with, tears easily, and seals well. It also comes off easily if you need to readjust the position. Next, I taped each of the front seams and most of the inside seams. Overall, it feels solid.
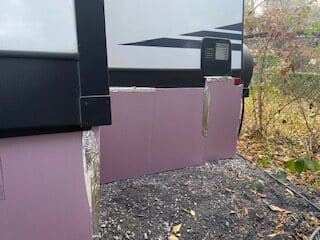
To allow for access to the dump levels, which I need to get to frequently, I simply attached a separate piece in front of the black and grey water valves and secured it with three pieces of vertically mounted tape, creating a makeshift hinge. It seems to work well, but if the tape wears out, I’ll simply replace it. Next, I cut a hole in the waste line for easy access. I will need to open up the foam door to dump, so it may have been a better option just to store it under the RV.
In places where I had some gaps (mainly on the front and rear ends of the RV), I used scrap pieces of board to cover them. I cut them extra wide to make sure that they seal well. The overall project took me about 3 hours to complete. However, once I got going, I moved much more quicker. By the end of the project, I was getting really cold working outside. I was using a headlamp and wearing gloves to finish it up. My recommendation is to do this work earlier in the fall to make it easier for you to complete.
Overall I am pleased with how it turned out. If I had more time or were to do it again, I would have likely had a cleaner job. However, aesthetics are not as crucial for doing this work as keeping my water system thawed. I am considering painting the board black to make it look a little nicer. I am also curious if this could help with keeping the area warmer on sunny days. I’ll update this post if I do this.
Exterior insulation
In addition to skirting the RV, I added additional insulation to some exterior areas of the RV. While each area may not make a significant difference, combined, they should have some benefit. Below are some additional places that I touched up for added protection and warmth.
Outdoor shower: I disconnected the shower faucet and drained the faucet as best I could. I added pink insulation batting inside the door and sealed it shut.
RV cable and satellite hookup box: Similar to the outdoor shower box, I added batting here as well.
Storage area access: I cut pieces of rigid foam board and attached them to the backside of each storage door. This insulation should significantly help keep the interiors of these storage areas warmer and consequently assist with keeping the living area warmer.
Hookup outlets: I added some insulation around the electric and water hookup points. While minimal, they provide direct access to critical areas such as the underbelly and pump housing.
Stove vent: I debated stuffing insulation into the exterior vent, but I haven’t decided yet. I do like to have an option for exhausting odors or steam when cooking. I will keep an eye on this area and see if any drafts are coming through the vent. If not, I may keep it open.
Outdoor Kitchen: I added some sleeping bags and bulky storage items to this area to provide some added insulation. I don’t use the outdoor kitchen in the winter, so this was a good way to get some added insulation and storage at the same time.
Indoor Insulation
Sealing up the interior of the RV is just as equally important as skirting. While it’s not directly tied to freezing pipes, it is essential for comfort. There are lots of small projects to undertake inside that can reduce drafts and improve efficiency.
One note of caution. If you have a heated underbelly and are relying on the furnace to keep it warm, you will need to run the furnace from time to time. While insulating the interior will help keep the living area more comfortable, there is only so much you can do. Your heat will still run regularly. However, it’s tempting to rely more heavily on an electric space heater if you increase efficiency. Just remember, you will need to think about the underbelly and piping in addition to the comfort of the living area. The propane furnace is what will provide heat to this area.
When tackling the interior, there are a few critical areas to target. While RV walls are not thick, most are insulated. Start by looking for the areas that aren’t insulated. A few accessible places to start with are ceiling fans, skylights, doors, windows, access panels, etc. Many of these areas just rely on a thin piece of plastic to separate you from the elements. Next, look around your RV, or better yet, get a temperature gun and start to see where you have cold spots or drafts.
Below are some of the areas that I targeted for improvements and how I went about doing it.
Ceiling vents/fans:
This retrofit, by far, was the most effortless one to make, and I think it will make a significant difference in keeping the heat in the living area. As we all know, heat rises, and the vents are a great place for it to escape. For about $12, you can buy a standard insulating pillow with reflective foam on the backside. Of course, you can make your own, but for the price, you will get a perfect fit for a standard vent and install it in less than a minute.
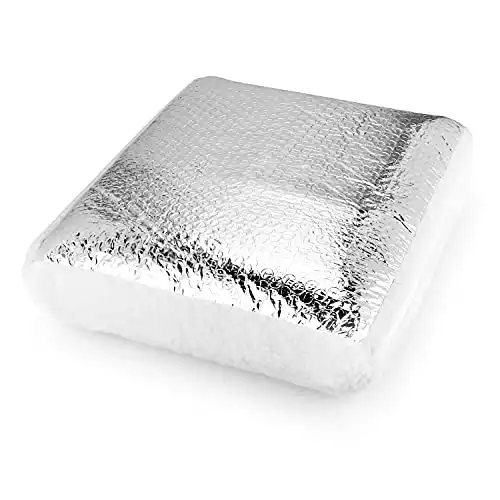
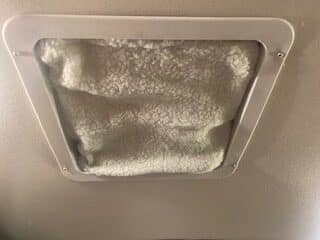
I have three vents in my RV, so I purchased one for each. They slide right into the opening, and aside from removing if you want to get some airflow, there is not much else you need to do. As an added benefit, these will work perfectly in the summer to help keep the RV cool.
I do have a skylight in my bathroom, which is larger than the vents. I can buy the same product for this opening, but it’s significantly more expensive at $40. So instead, I will opt to cut a piece of foam board to provide the same benefit.
Entrance door:
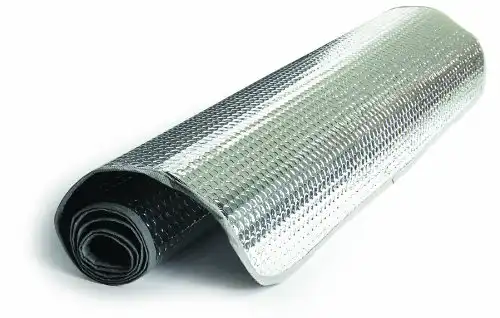
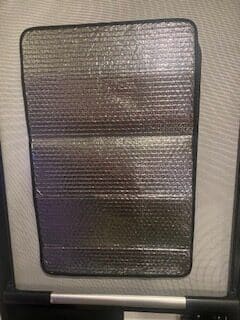
The exterior doors in RVs are relatively thin and do not provide much insulating value. The window is also an exceptionally cold spot that can lead to heat loss. To address this, I bought a custom cover made out of Reflexit, the same material on the backside of the vent covers. This cover attaches with velcro strips that you can easily remove to let light into the living area.
Windows
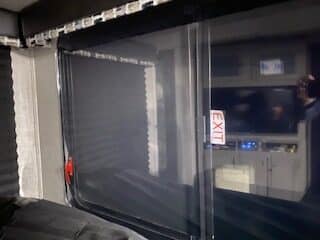
RV windows are probably the DIY project that will result in the most significant improvement in heat retention. Unfortunately, these windows are single-pane and not very efficient. You can correct this with two simple retrofits: window wrap and Reflexit. I decided to do both.
Wrapping the windows is cost-effective and straightforward. For $10, I purchased a window insulation kit that was enough to cover all ten windows in my RV. Installation could be tedious, but as you get the hang of it, it moves pretty quickly.
To install, you start by measuring each window and cutting a piece of film a few inches bigger. Next, you apply the included two-sided tape around the frame of the windows and carefully align the film edges with the tape. Next, press the film to make sure you have a good seal. The last step, and most rewarding, is to apply heat with a hair dryer or heat gun (on low) and watch the plastic wrap shrink taught. If done correctly, you can barely even notice the film on the windows. However, be careful not to use too much heat, or you may burn a hole in the wrap. Ask me how I know?
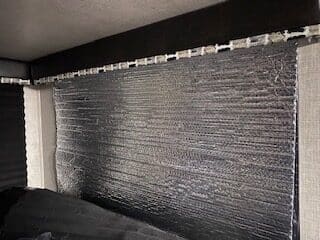
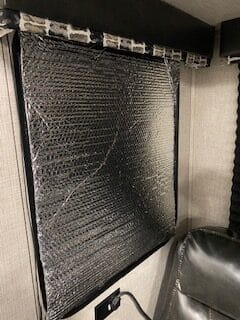
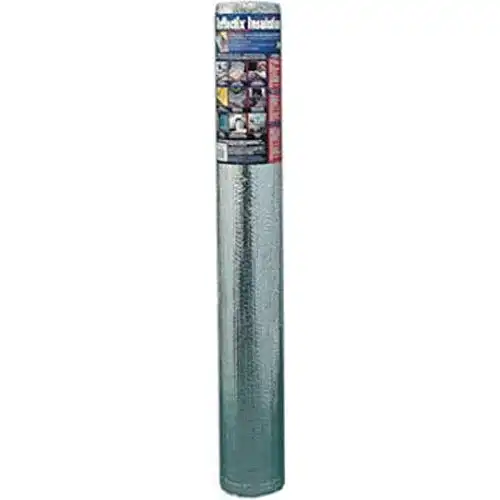
If you want to achieve maximum efficiency, the final step for finishing the windows is to cover them with a sheet of Reflexit. These come in different-sized rolls, so get the size that is best for your windows. Next, create a custom-sized sheet fr the window and secure it with velcro tape. You can then easily remove it to let light into the RV during the day.
Together these two steps will allow you to significantly improve the efficiency of your windows and keep more heat inside. Admittedly, it’s not the most aesthetic solution, but you won’t even see it if you have blinds. So far, I have noticed a difference.
Tracking Progress
I will be updating this post regularly, keeping everyone updated on new modifications, sharing successes or failures, and new data on how everything is performing. I also hope to learn from all of you about ideas or suggestions for additional retrofits or adjustments. So please feel free to start the conversation with a comment below.
Also, I want to invite all of you to sign up for updates. When I post some new information, I can send reminders out via email to come back and read. At a minimum, I hope to provide a weekly update. If you want to subscribe, please sign up below.
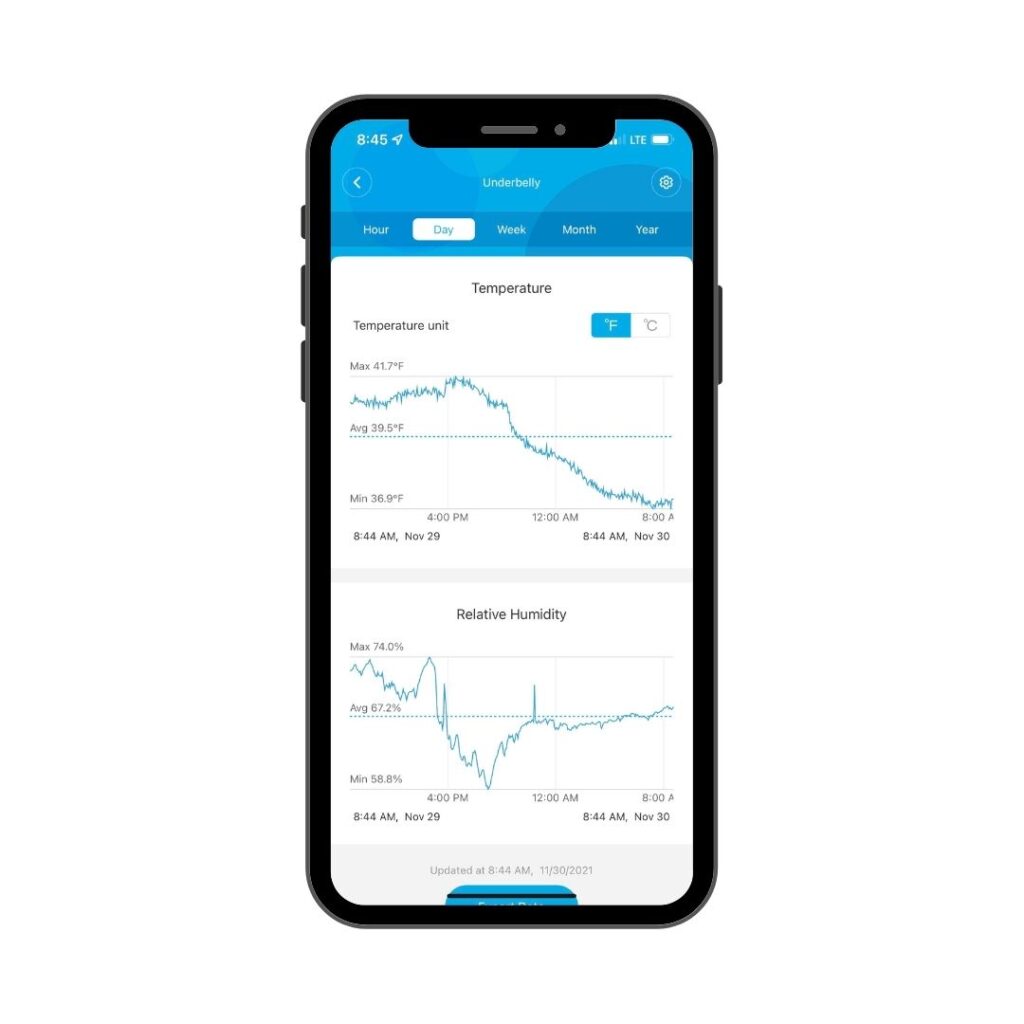
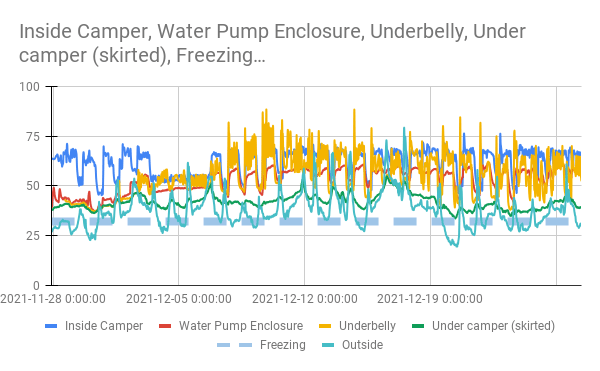
Since I have temperature data to track everything, I decided to create a graph that I will update several times per week. The information displayed here shows the location of each sensor and provides a data point at 30-minute increments. Again, I will be adding new data several times per week, so please check back regularly.
Temperature Graph (updated regularly)
November 30, 2021 Update
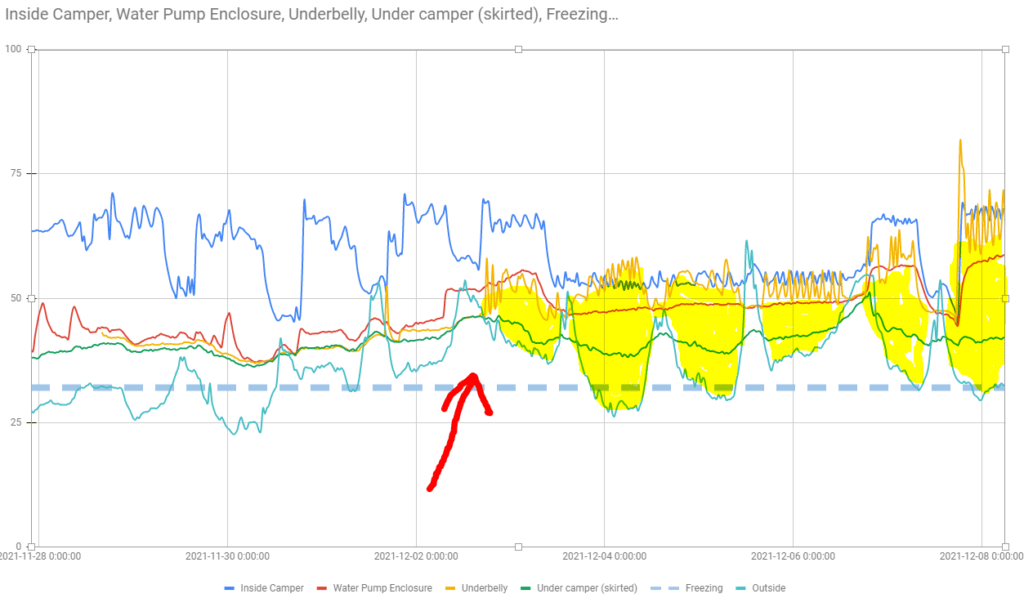
It’s been four days since I began my winterization project. So far, everything has been operating smoothly. The temperature has been pretty cold for this time of year, but it’s manageable as each day, even if just slightly, has a few hours where the outside temperature climbs above freezing. Last night was the closest dipping into the low 20s. The open area under the camper and the underbelly performed well, but they did slip into the high 30s. I’m a little nervous about prolonged periods of cold at this temperature and curious about how these areas will respond. I think that I am going to purchase the heat lamp and have it ready. I’ll install it under the main plumbing area near all three tanks (fresh, grey, and black).
I still need to finish insulating all of the windows. I’m about halfway finished with that project. However, I did notice a big difference with the few that I completed. The living area is much more comfortable. I hope to get that finished by the weekend. I’ll be away for a few days starting Friday, so I may drain my water lines to save on propane. More to come!
December 13, 2021 Update
I have just about everything sealed up. The windows are all done and insulated with Reflexit. I wasn’t expecting it to make as much of a difference. The interior temperature is very stable, and when the heat runs, it cycles off pretty quickly. While it has been a little milder over the last several days, I have noticed a significant reduction in propane use. The furnace cycles on a little less, but instead of running for 20 minutes, it runs for less than 10 minutes. I have been on a single 100 lb tank of propane for over two weeks now. I think I can get about 4-5 days out of it too. That’s a really significant change, as prior to making any improvements, it lasted about a week.
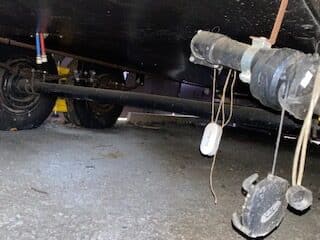
I was out of town for four days at the beginning of December. I was actually very nervous to leave since the temperatures would be dipping into the mid-20s. Before I left, I put a lot of thought into keeping the underbelly warm. I just wasn’t seeing high enough temperatures for the underbelly from the furnace. I traced the line from the furnace and saw that it was just emptying into the large void under the living room. It impacts the greywater kitchen tank but was missing the primary water area of the underbelly (the bathroom and freshwater tank). For me, this was just a terrible design. I debated cutting a hole in the floor under the bed and installing an inline vent fan to push warm cabin are into the underbelly. This would have cost me about $120 for supplies. However, I pulled up my bedroom floor vent, right between the fresh and black tank, and reached inside the underbelly. There was a large gap there that was not getting warmed much by the furnace. Before I left, I decided to disconnect the floor vent and let it run into the underbelly. This was the perfect solution to my problem.
As you can see on the graph below, starting on 12/2, the underbelly is staying nice and toasty. I had the cabin temperature set at 45 degrees when I left. Every time the furnace kicked on, it shot hot air straight into the most critical section of the underbelly. The temperature there had stayed at a very stable temperature, even when the outside temp dropped. I think I’ll leave it like this all winter. There is enough warm air that enters the bedroom area without the floor vent directly connected. I may use a
Check out the yellow highlighted portion of the graph. This indicated the time after making the floor vent change. Prior to this, the underbelly and under camper (skirted area) were pretty much the same.
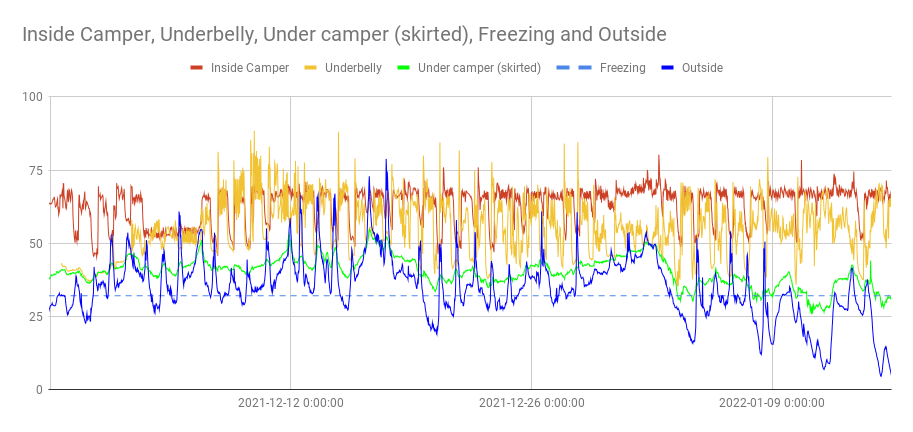
January 15th, 2022 Update:
Well, NY winter has finally arrived. Today’s low is supposed to be -1 degree F, and the forecast is looking like single digits for most nights and just a handful of days that peak above freezing. So far, the RV has been holding up pretty well (knock on wood). The inside temperature has been staying very comfortable and livable. The skirting has been a huge plus. As you can see in the updated graph below, the temperature underneath the camper has been above freezing for most of the time and is only dropping a few degrees below freezing when we’re in single digits. Most of January has been below-freezing.
The biggest issue has been the wind. There has been a couple of times when my makeshift tank access door has come undone. This exposed the skirted part of the RV to colder temperatures, but I was able to fix it quickly before it became an issue. I reinforced all of the panels with extra tape and some additional stakes to hopefully weather the 40MPH wind gusts that are coming with a storm tomorrow.
The underbelly hack of disconnecting the floor vent has been fantastic. As you can see, my underbelly hasn’t even come close to freezing temps, no matter how cold it has gotten. Propane use has also been pretty good. I’ve been getting about two weeks out of a single 100lb tank. So, it has cost me about $150/month to heat everything. I expect this to drop significantly with the colder temps. I still think I will get about a week and a half out of a 100lb tank. This is miles above where I was before the skirting and insulation inside.
You may also notice that I removed the water pump enclosure thermometer. There just wasn’t any reason to keep that in there since it has stayed fairly stable. Instead, I moved it to the outside compartment for the refrigerator. I installed a 100W bulb in there, trying to keep my fridge lines safe. So far so good. I actually have it hooked up to a wifi plug and used an automation tool to turn it on whenever the temperature is below freezing. It turns off automatically when it climbs above freezing. I may end up doing the same thing with the heat lamp (we’ll see).
Signing off for tonight! I’ll post more updates later this month.
good Luck.
I read with interest , as I also have an RV upstate ny that I will inhabiting this winter. albeit in a part time position.
https://photos.app.goo.gl/EVdviKRbfZghLFNt9
Two weeks ago i also enclosed my 32′ 1989 Pace Arrow with closed cell foam sheets that i found in a construction dumpster.
( I am the cheapest man on the planet, as I still chaff at the $22 in hardware needed)
This rv has housed me through a few Central New Jersey winters, and I can say with some veracity, the pipes wont burst unless it gets way below freezing, ( but definitely will, ask me how I know) .
Anyhoo, looking forward to following your progress through the winter ( and perhaps beyond).
Peace
Pete
Thanks for following along, Pete. With this type of stuff, it’s definitely nice to have a community out there to provide support and guidance. Nice setup and view. Keep me posted on your project and I’ll do the same.
This has been the most comprehensive and clearest winterization article I have seen so far. Your “how to” descriptions of the things you have done are especially helpful. Thank you.
I’m glad you found it useful. If you have any questions or need any additional tips, please don’t hesitate to reach out. Best of luck!
Great articles on how to winterize the trailer. We just bought a 2022 28 ft Shadow Cruiser that is supposedly “All Season” after reading many sites it seems we can forget that noise! Your article has been extremely helpful. I will continue to follow!